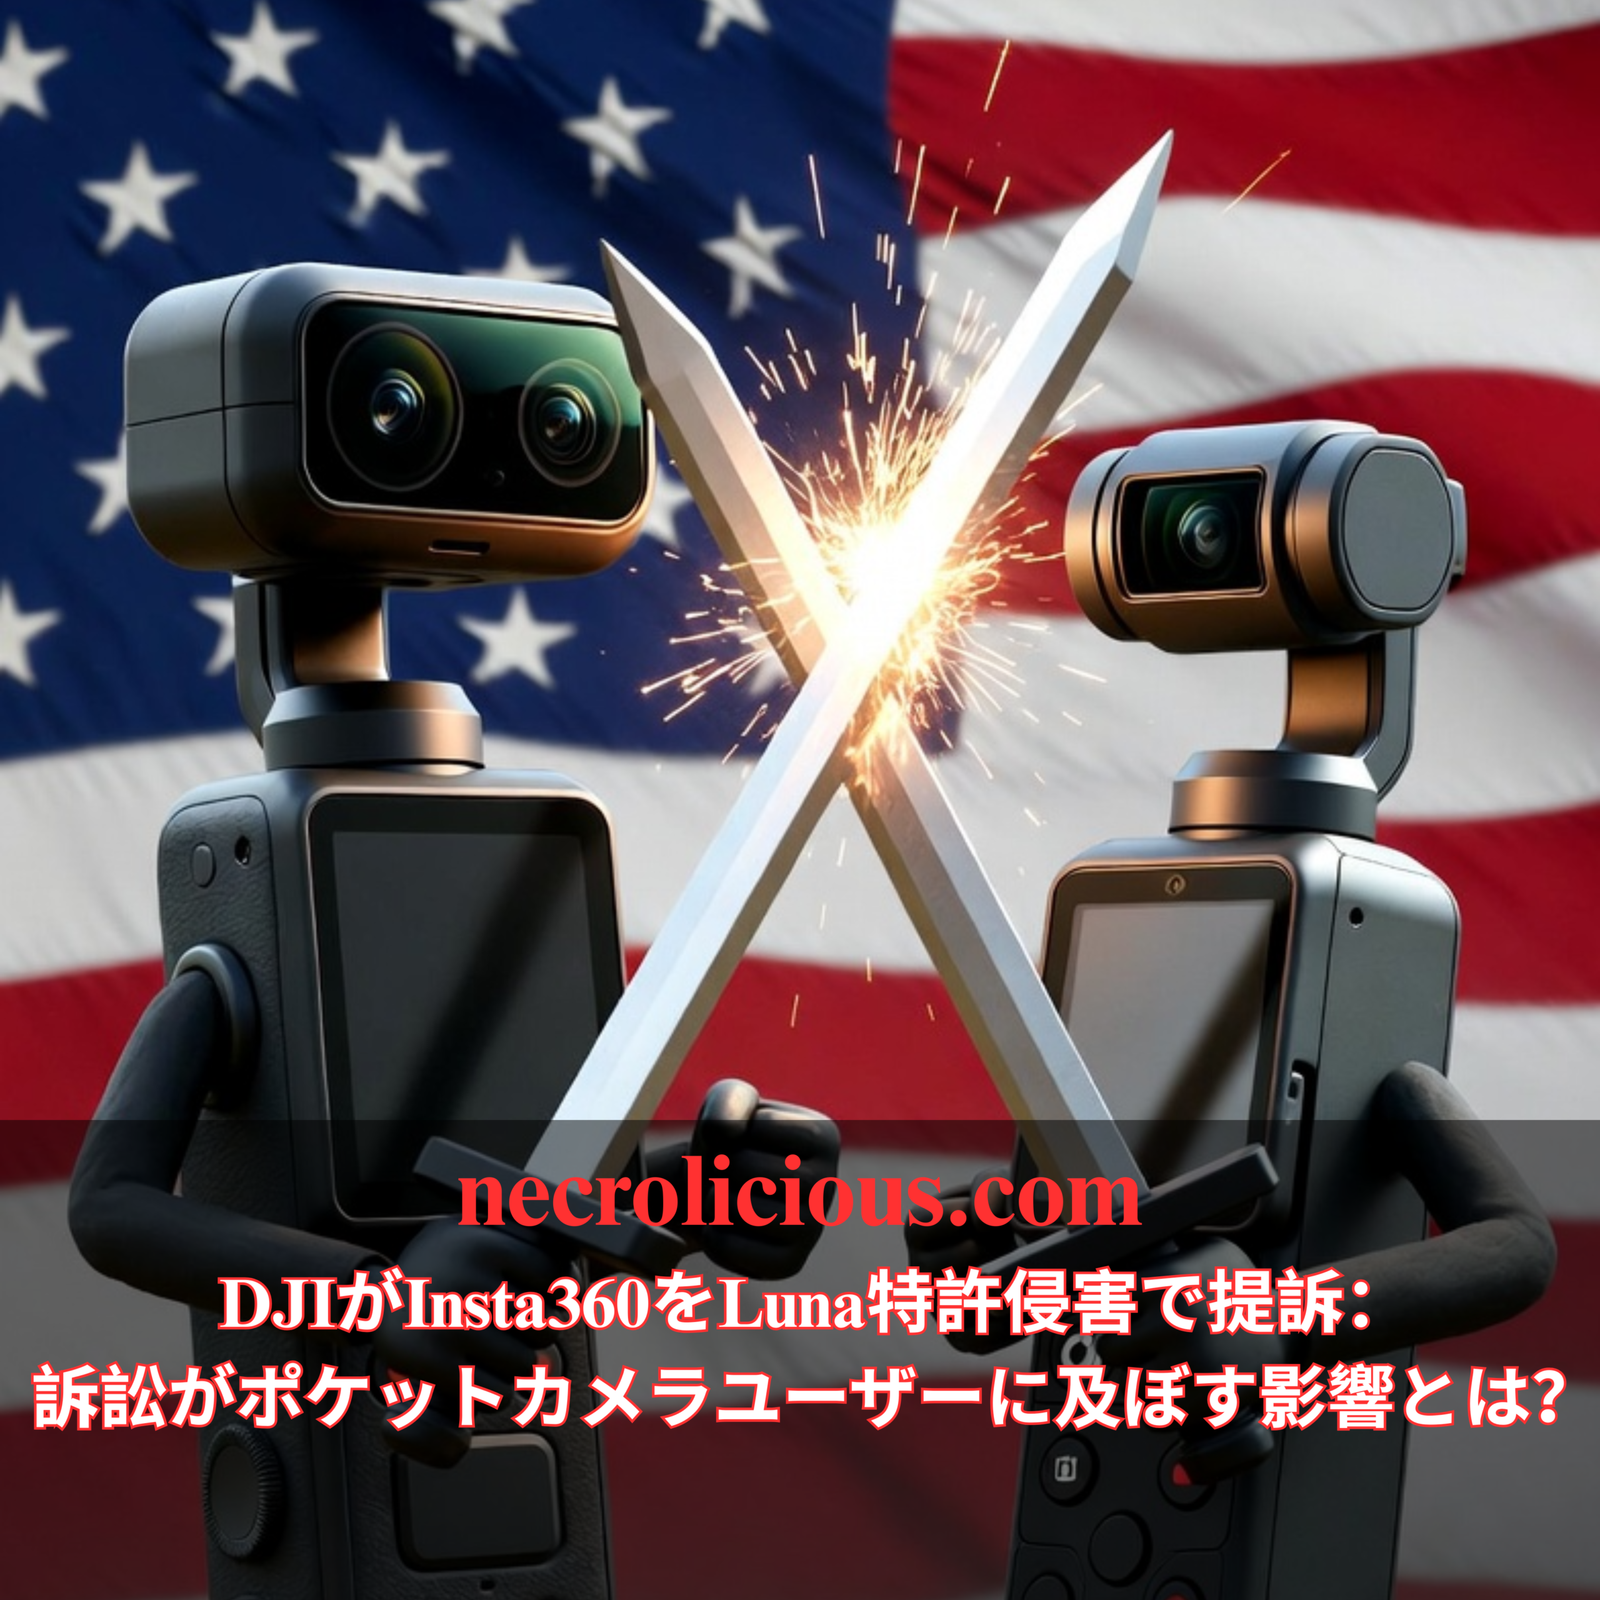
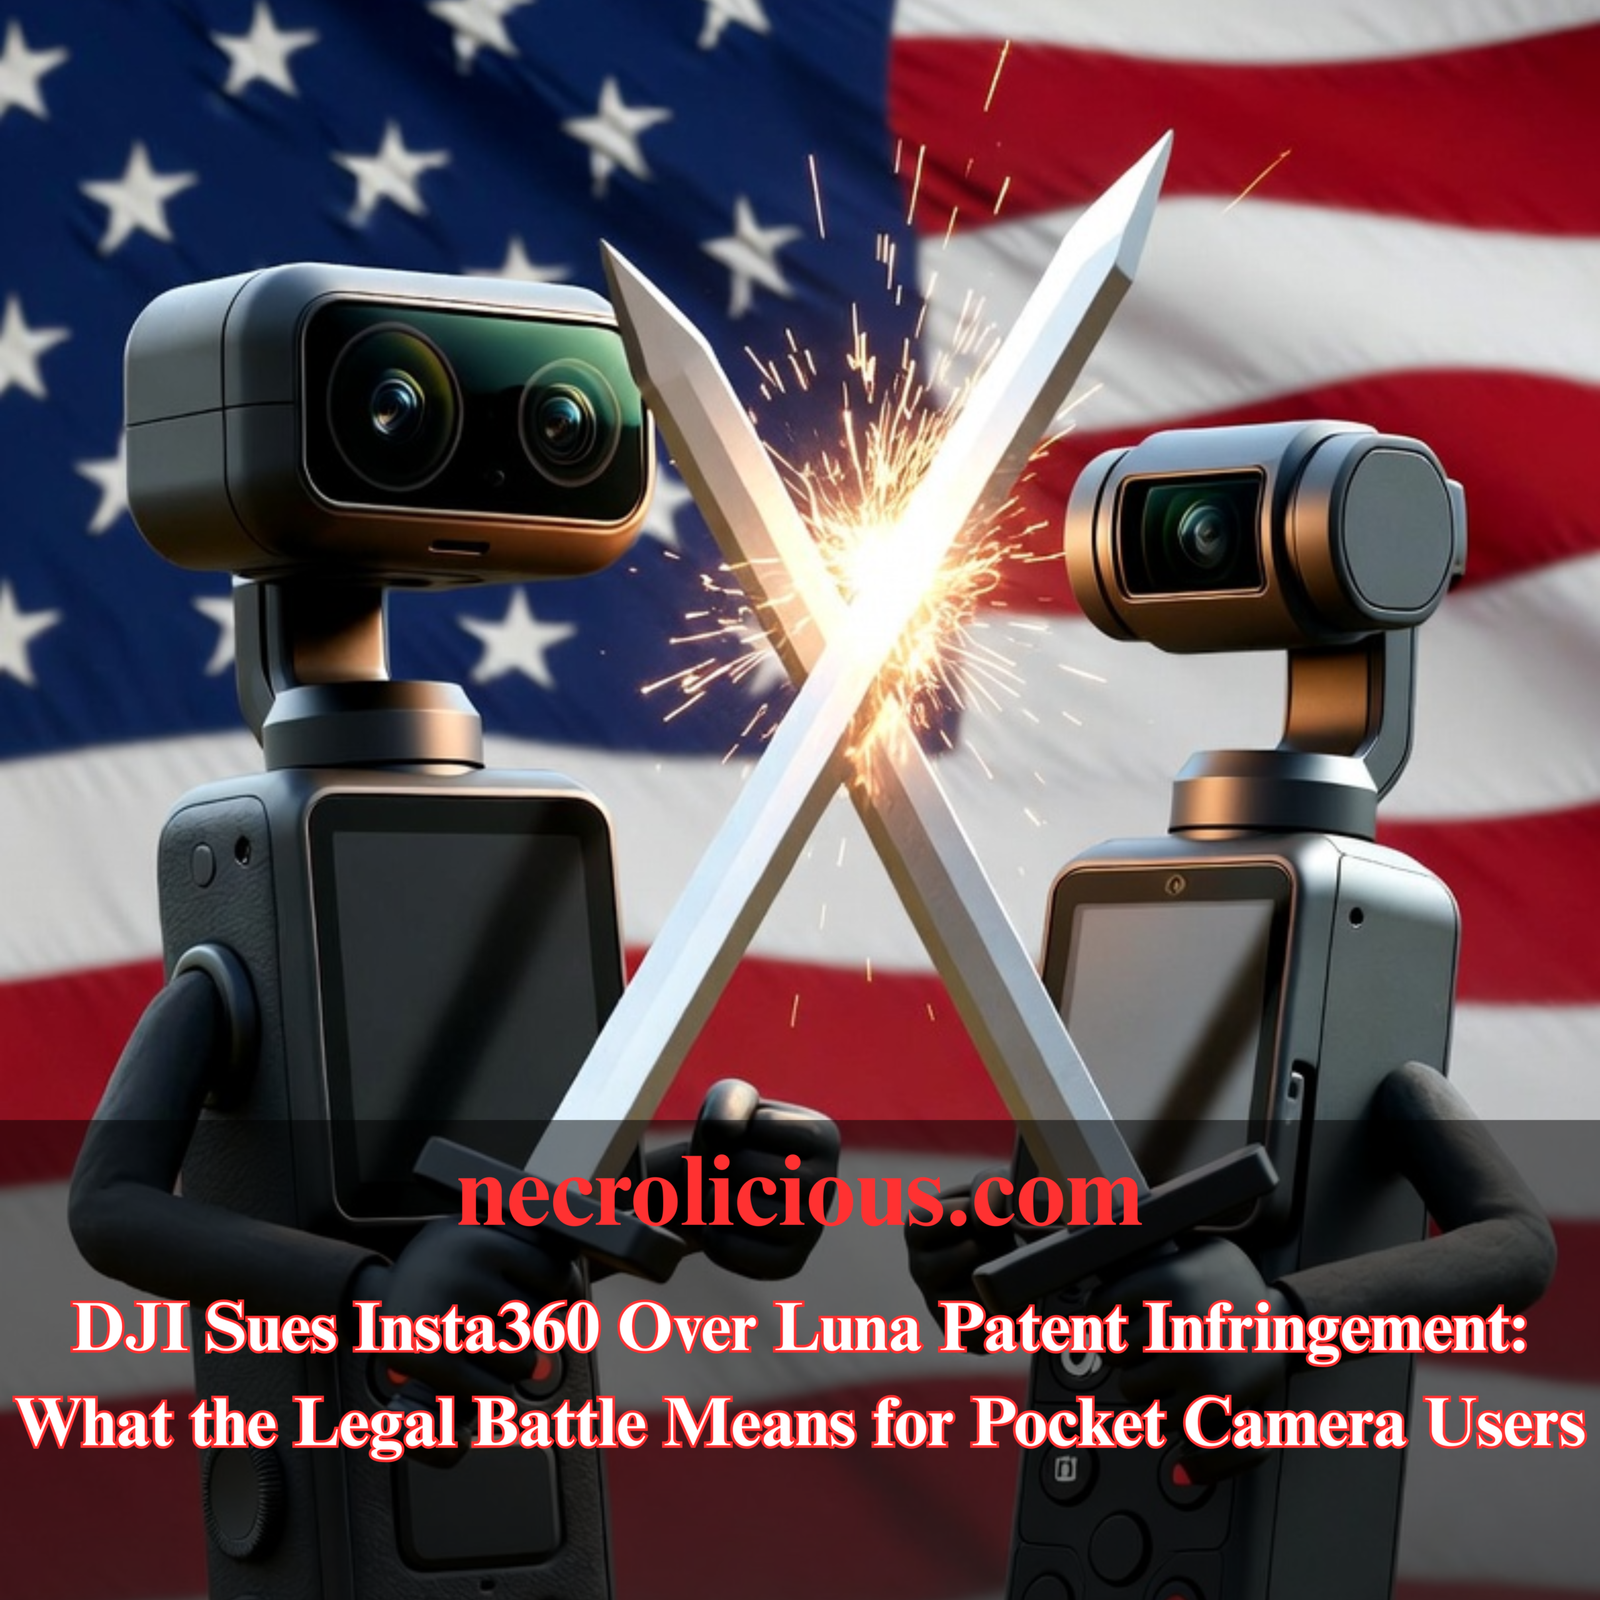
If you have been following the pocket gimbal camera space, the news that DJI has filed patent lawsuits against Insta360 raises immediate questions about product availability, future design choices & whether the category faces prolonged uncertainty.
The core dispute centres on Insta360’s new Luna series gimbal cameras, which DJI alleges copy protected elements of its Osmo Pocket line. This legal action adds another chapter to the rivalry between two Shenzhen-based companies that dominate the space for creators seeking stabilised, high-quality footage without bulky equipment.
Background to the Dispute
Both DJI & Insta360 operate from Shenzhen, the hub of China’s consumer electronics industry. DJI built its reputation on drones before expanding into the Osmo Pocket range, which introduced a compact form factor with integrated three-axis stabilisation, a flip-out screen & intuitive controls. Insta360, known initially for 360-degree cameras, has pushed into the same pocket gimbal segment with the Luna Pro & Luna Ultra models.
The timing of the US filings proved deliberate. DJI submitted two lawsuits in the Eastern District of Texas on or around 10–11 June 2026, the same day Insta360 began official US sales of the Luna Ultra. One complaint targets two US design patents covering the ornamental appearance of the Osmo Pocket 3. The second alleges infringement of four utility patents relating to gimbal control modes, built-in subject tracking & integrated display systems that eliminate the need for a separate smartphone app.
DJI describes the Luna as a “wholesale” copy & seeks a permanent injunction against US sales, reasonable royalty damages, profit disgorgement & enhanced damages for alleged willful infringement.
Insta360 responded within roughly 24 hours. By 12 June the company had filed two countersuits in the same Texas court, asserting five of its own utility patents. These cover gimbal stabilisation, gimbal directional control, camera smooth stabilisation, telemetry overlay & panoramic video stabilisation technologies — features Insta360 claims appear in various DJI products, including the Osmo Pocket line.
This rapid back-&-forth has turned the dispute into a clear mutual patent battle. Both sides are now actively asserting their intellectual property in the same US venue.
Why File in the United States?
Patent rights remain territorial. These are US patents & the alleged infringement occurs through importation, sale & use in the American market. US courts are the proper forum to seek remedies — particularly a permanent injunction — that can directly affect US distribution & sales.
The Eastern District of Texas, particularly the Marshall Division, attracts many patent plaintiffs because of its experienced judges, relatively swift timelines & procedural rules often viewed as favourable to patent holders. DJI is also targeting the US because it remains a significant revenue opportunity for premium pocket gimbal cameras.
DJI’s Own Challenges in the American Market
The situation carries notable irony. Newer DJI models, including the Osmo Pocket 4 & Pocket 4 Pro, currently face barriers to official US sales. Following updates to the FCC Covered List in late 2025 & early 2026, new equipment authorisations for certain DJI products have been withheld on national security grounds. Existing, previously authorised models such as the Osmo Pocket 3 remain legally available through retailers.
This regulatory backdrop gives Insta360 a temporary opening in the US for its unrestricted Luna launch. DJI’s legal move can therefore be read as an attempt to neutralise that advantage through intellectual property enforcement. Insta360’s rapid countersuit with five patents further levels the legal playing field.
The US cases do not stand alone. In March 2026, DJI filed a patent ownership lawsuit against Insta360’s parent company, Arashi Vision, in the Shenzhen Intermediate People’s Court. That action concerns six patents covering drone flight control, structural design & image processing. DJI contends that former employees developed the inventions within one year of leaving the company, qualifying them as “service inventions” under Chinese law that should belong to the original employer.
Insta360 rejected the claims publicly & pointed to its own portfolio of at least 28 related patents. The Chinese case focuses on ownership & employee mobility, while the US cases address product-level infringement. Together they illustrate a coordinated, multi-jurisdictional strategy.
Comparable Patent Disputes in Technology
This pattern echoes earlier high-profile conflicts. Huawei, operating under substantial US restrictions, filed patent infringement suits against Verizon in Texas district courts in 2020. The matter settled in 2021 on confidential terms that satisfied both parties, demonstrating that restricted Chinese companies can still extract value through US patent enforcement.
In the drone sector itself, rival Autel Robotics prevailed in a US International Trade Commission proceeding against DJI around 2020, resulting in findings that certain DJI patents were unpatentable. Such outcomes show that defendants can successfully challenge validity or prove non-infringement.
Chinese courts have also seen rising plaintiff success rates in patent matters, with win rates often exceeding 80% once infringement is established & injunctions frequently granted. DJI’s domestic filing fits this evolving landscape of stronger IP enforcement inside China.
The following table summarises key precedents & their relevance:
Case
Plaintiff
Defendant
Venue
Outcome
Notes
Huawei v Verizon (2020-2021)
Huawei
Verizon
US District Courts, Texas
Settled confidentially
Restricted Chinese company achieved practical commercial resolution
DJI v Irdeto (2025-2026)
DJI
Irdeto
Texas federal court + China CNIPA
DJI invalidated two patents in China
Combined US filing with successful Chinese invalidation
Autel v DJI (~2020)
Autel Robotics
DJI
US ITC
Autel prevailed on certain claims
Defendant successfully challenged patent validity
General trend: Chinese plaintiffs in China
Chinese companies
Various
Chinese courts
High win rate (~80%) with frequent injunctions
Strong domestic enforcement environment
Most technology patent disputes conclude through settlement rather than final judgment. Cross-licensing agreements often emerge, allowing both parties continued market access while recognising each other’s intellectual property.
Practical Implications for Buyers & Creators
For enthusiasts & professionals, the immediate effects remain limited. Older Osmo Pocket models continue to be sold legally in the US. Newer Pocket 4 series units face authorisation hurdles but can still reach users through grey-market channels, albeit without official warranty support in some cases.
Should DJI secure an injunction against the Luna in the US, Insta360 might need to redesign affected features or negotiate licensing terms. Such changes could delay availability or alter the product’s final specification. Conversely, a strong defence by Insta360 or a negotiated settlement could preserve choice for consumers.
The dispute also highlights the value of diversified options. Creators who rely on pocket gimbal cameras benefit from monitoring both brands, as competitive pressure has historically driven rapid improvements in stabilisation, tracking & image quality.
What Happens Next?
No public resolution has been announced for either the US or Chinese actions. The Texas cases will likely involve discovery, claim construction & possible summary judgment motions before any trial. The Shenzhen matter focuses on ownership questions that could influence future licensing negotiations.
The swift mutual filings — DJI’s initial suits followed by Insta360’s countersuits within roughly 24 hours — indicate both companies view their patent portfolios as core strategic assets. Industry observers expect continued legal manoeuvring, possible additional filings or negotiations that could lead to cross-licensing or settlement. Such outcomes are common in tech/hardware patent disputes & often allow both parties to continue innovating while resolving IP conflicts commercially.
Necrolicious “Photogenic” Funny Nosferatu Vampire Meme 100% Cotton Unisex Tee Buy on Printify
FAQ
Will the Insta360 Luna be banned from sale in the United States? Only if DJI obtains & enforces a permanent injunction. The case remains at an early stage & many similar matters settle before that point.
Can I still buy DJI Osmo Pocket cameras in the US? Previously authorised models such as the Pocket 3 remain legally available. Newer Pocket 4 variants face FCC authorisation restrictions but grey-market options exist with associated risks.
Has Insta360 countersued? Yes. Within about 24 hours of DJI’s June 10/11 filings, Insta360 filed two countersuits in the same Texas court asserting five of its own patents related to gimbal & stabilisation technologies used in DJI products.
Does the China lawsuit affect current Insta360 products? It primarily addresses ownership of six specific patents. Any ownership transfer would require a court ruling & could influence future licensing rather than immediate product recalls.
Are similar lawsuits expected in Europe or other regions? No confirmed filings have been reported outside China & the US. Companies frequently expand disputes to additional jurisdictions when products are sold globally.
How might this affect prices or innovation? Prolonged litigation can raise costs for both companies, potentially influencing pricing. At the same time, the competitive dynamic has accelerated feature development in the pocket camera category.
Unless otherwise noted, image assets above are NOT original content & are shared under fair use doctrine with NO claims to authorship or ownership. Contact necrolicious@necrolicious.com for credit or removal.
This post was sponsored by…ME! If you’d like to support, please buy my original meme merchandise or check out my affiliate links to get yourself some other cool things. Additional affiliate links may be contained in the above article. If you click on an affiliate link & sign up/make a purchase, I may earn a commission. This does not increase the price you pay for the product or service, so it helps support this website at no cost to you.
If you would like to support my work more directly, I accept voluntary cryptocurrency donations in BTC, ETH, XRP & XLM sent directly to necrolicious.x. necrolicious.x is an Unstoppable Domains name that resolves to the wallet addresses I have configured. Simply enter necrolicious.x as the recipient in a supported wallet (such as Trust Wallet, Blockchain.com or others that support Unstoppable Domains). Donation Disclaimer: All cryptocurrency donations sent to me are final, voluntary gifts & are non-refundable & irreversible. These donations are not tax-deductible since I am not a registered charitable organization, & no tax receipts will be issued. No memo or destination tag is required for XRP or XLM donations, as the domain resolves directly to a wallet address. By sending a donation you acknowledge & accept all associated risks, including cryptocurrency price volatility, network fees & potential loss of funds due to incorrect network selection or transaction errors. I am not responsible or liable for any loss related to your donation. No goods, services or other benefits are provided in exchange for donations. This is not financial, tax, legal or investment advice. Please consult a qualified professional regarding any implications of your donation.
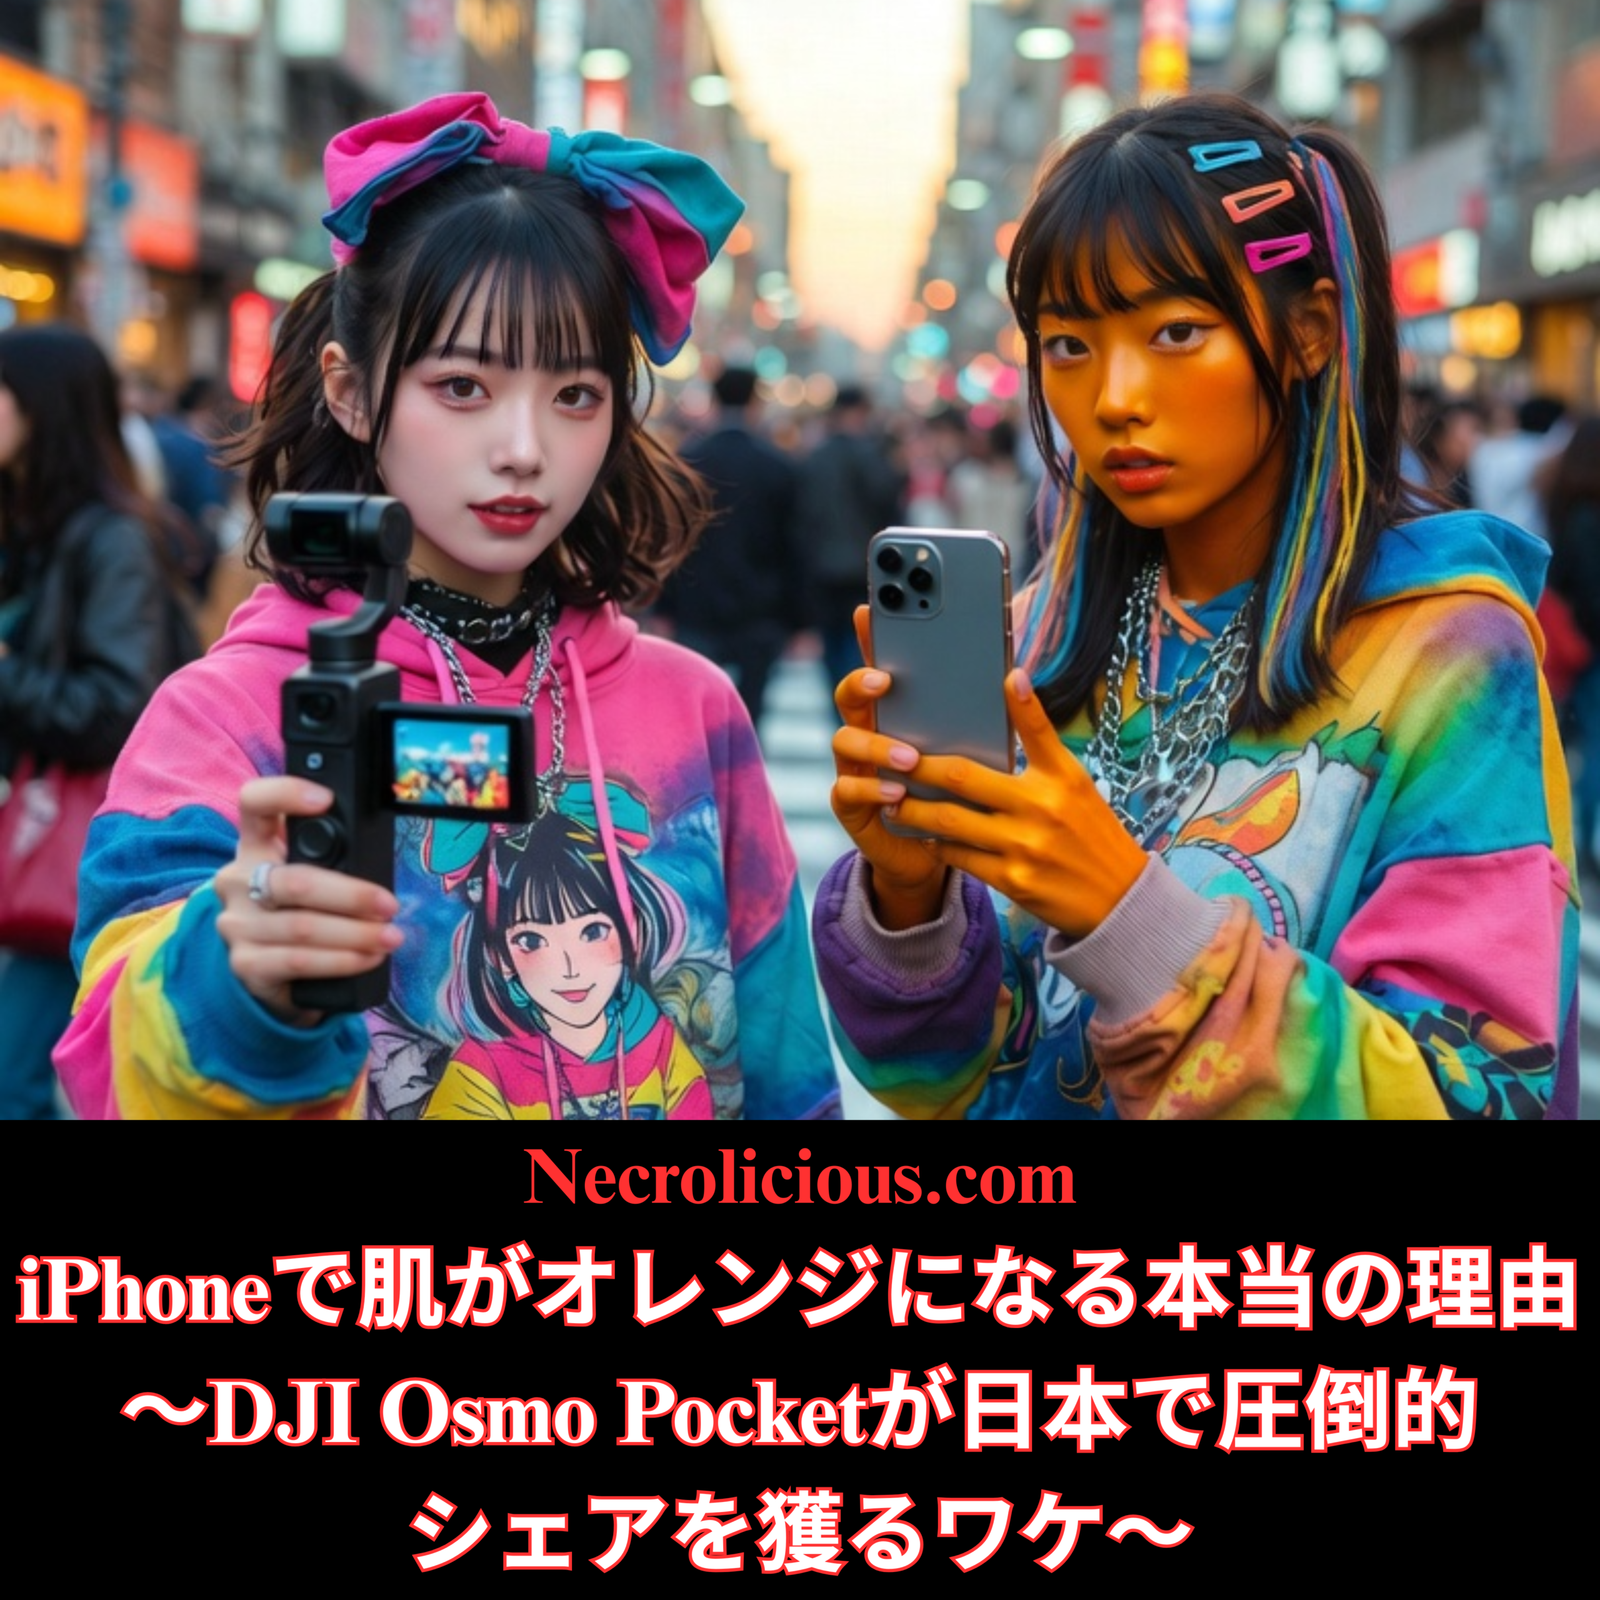
In April 2026, the DJI Osmo Pocket 4 captured 21.5 percent of Japan’s entire video camera market in just nine days. When combined with the still-popular Osmo Pocket 3 the two models together represented nearly 39 percent of sales in the category. Overall DJI achieved a record 72.5 percent share according to official BCN+R point-of-sale data. These results stand out in a nation where iPhone adoption remains high among younger users. The figures point to a practical response to everyday frustrations with smartphone photography rather than mere gadget enthusiasm.
DJI’s Record-Breaking Performance in Japan’s Video Camera Market
BCN+R rankings from mid-May 2026 confirm the scale of the launch effect. The Osmo Pocket 4 launch drove a 158 percent year-on-year rise in overall video camera unit sales for April. DJI models claimed the top four positions with the Pocket 4 in first place & the Pocket 3 in second. Additional DJI entries such as the Osmo Action 4 & Osmo Nano rounded out the list.
Sony, Canon & Nikon together with Panasonic & GoPro held only single-digit shares within the BCN-tracked “video camera” segment. This category covers compact action cameras, pocket gimbals & similar portable devices rather than larger mirrorless systems or professional camcorders. DJI’s focus on mechanical stabilisation & creator-friendly features has allowed it to define the segment over multiple generations.
Japan’s strong gadget culture & active vlogging community have sustained demand for dedicated devices even as global compact camera sales declined after 2010. The Pocket series delivers smooth cinematic footage through built-in three-axis gimbals, flip screens & one-handed operation that smartphones cannot replicate without extra equipment.
The Persistent Shortcomings of iPhone Computational Photography for Human Subjects
Recent iPhone models incorporate advanced hardware & sophisticated algorithms yet they repeatedly fail to deliver natural results when photographing people. Despite substantial research & development investment the post-processing produces orange or yellowish skin tones, excessive sharpening that highlights every pore & texture, & unnatural smoothing that can thin or erase eyebrows under common lighting conditions.
These outcomes feel particularly inconsiderate because most users capture images of themselves, family members & friends far more often than landscapes or wildlife. Daily life involves selfies, group photos & casual video calls while national park excursions or scenic holidays occur only once or twice a year for the average person. When a flagship device costing 200,000 yen consistently distorts the human form — the subject people care about most — it creates ongoing dissatisfaction.
I personally encountered this directly with the iPhone 13 Pro Max. Self-portraits appeared unrecognisable with pronounced orange casts & vanishing eyebrows. My immediate response was to purchase a DJI Osmo Pocket 3 to obtain reliable, non-distorted/tinged video & stills for content creation. Only after switching to a Samsung Galaxy Z Flip 6 did native phone photography become consistently usable without these distortions. The Pocket 3 now sees occasional use at most, demonstrating how one well-tuned device can eliminate the need for workarounds.
Such issues are not unique to one model. Similar complaints appear across all iPhones since the 13 series regarding camera rendering & video. Apple excels in metrics such as dynamic range & low-light performance yet these strengths matter less for the predominant use case of human-centred photography.
Korean Beauty Standards, Pale Complexions & Camera Processing Preferences
Korean beauty ideals emphasise strikingly pale, porcelain-like skin even more prominently than in Japan. This preference, often described as “glass skin” with a dewy yet luminous translucency, traces back to historical associations of fair skin with higher social status & has been amplified by K-pop, dramas & the global K-beauty industry. Japanese standards also value pale, even complexions through the concept of “bihaku” but tend toward a softer “mochi skin” texture that appears naturally nurtured rather than intensely luminous. These distinct preferences are clearly reflected in the camera features on Samsung devices, whereas iPhone cameras are oddly tailored to African diaspora & other darker skinned demographics on the global market at the expense of anyone who values pale beauty.
Samsung’s image processing aligns more closely with these regional preferences. It delivers smoother skin tones, balanced warmth & less aggressive sharpening that supports the desired pale, flawless appearance without introducing orange casts or over-emphasised texture. Whether this stems from deliberate optimisation for Asian markets or broader tuning differences remains open to discussion. Nevertheless, this is not just my opinion. Many users in Korea & across East Asia report more pleasing results for self-portraits & video with Samsung devices compared with recent iPhones.
This cultural emphasis on pale, harmonious skin makes accurate & flattering rendering essential. When smartphone cameras fail to support these daily beauty expectations users seek alternatives such as pocket gimbals that preserve natural tones & deliver smooth footage suitable for social media.
In South Korea the “young-tro” movement sees many young women carrying both a current flagship & an older iPhone model such as the XS, X or SE 1. The older hardware provides gentler, more film-like processing that avoids the heavy computational interventions of newer iPhones. While the trend is most visible in Korean social media it reflects wider East Asian sensitivities around natural skin rendering.
In Japan high iPhone status & ecosystem integration mean many users retain their devices & simply add a dedicated camera for critical moments. The Osmo Pocket series popularity arises partly from this compensatory behaviour. Its pocketable design allows seamless pairing with an iPhone for vlogging or family videos where flattering human subjects matter most.
Samsung maintains a leading 54 percent market share in Korea versus Apple’s 32 percent. Its processing & in-app editing tools resonate strongly with users who prioritise daily self & family documentation over occasional nature photography.
Balanced Perspective on Market Trends & Future Outlook
DJI’s success combines genuine innovation with responses to smartphone shortcomings. iPhone dissatisfaction contributes but does not explain the full picture. Japan’s electronics enthusiasm, short-form video growth & the sheer convenience of pocket gimbals play equally important roles.
While racial or demographic tuning in Apple’s algorithms has never been formally announce, likely to avoid lawsuits, persistent user feedback across regions highlights the need for better adaptation to common portrait scenarios. Samsung’s approach demonstrates that alternatives exist & can build loyalty in key Asian markets.
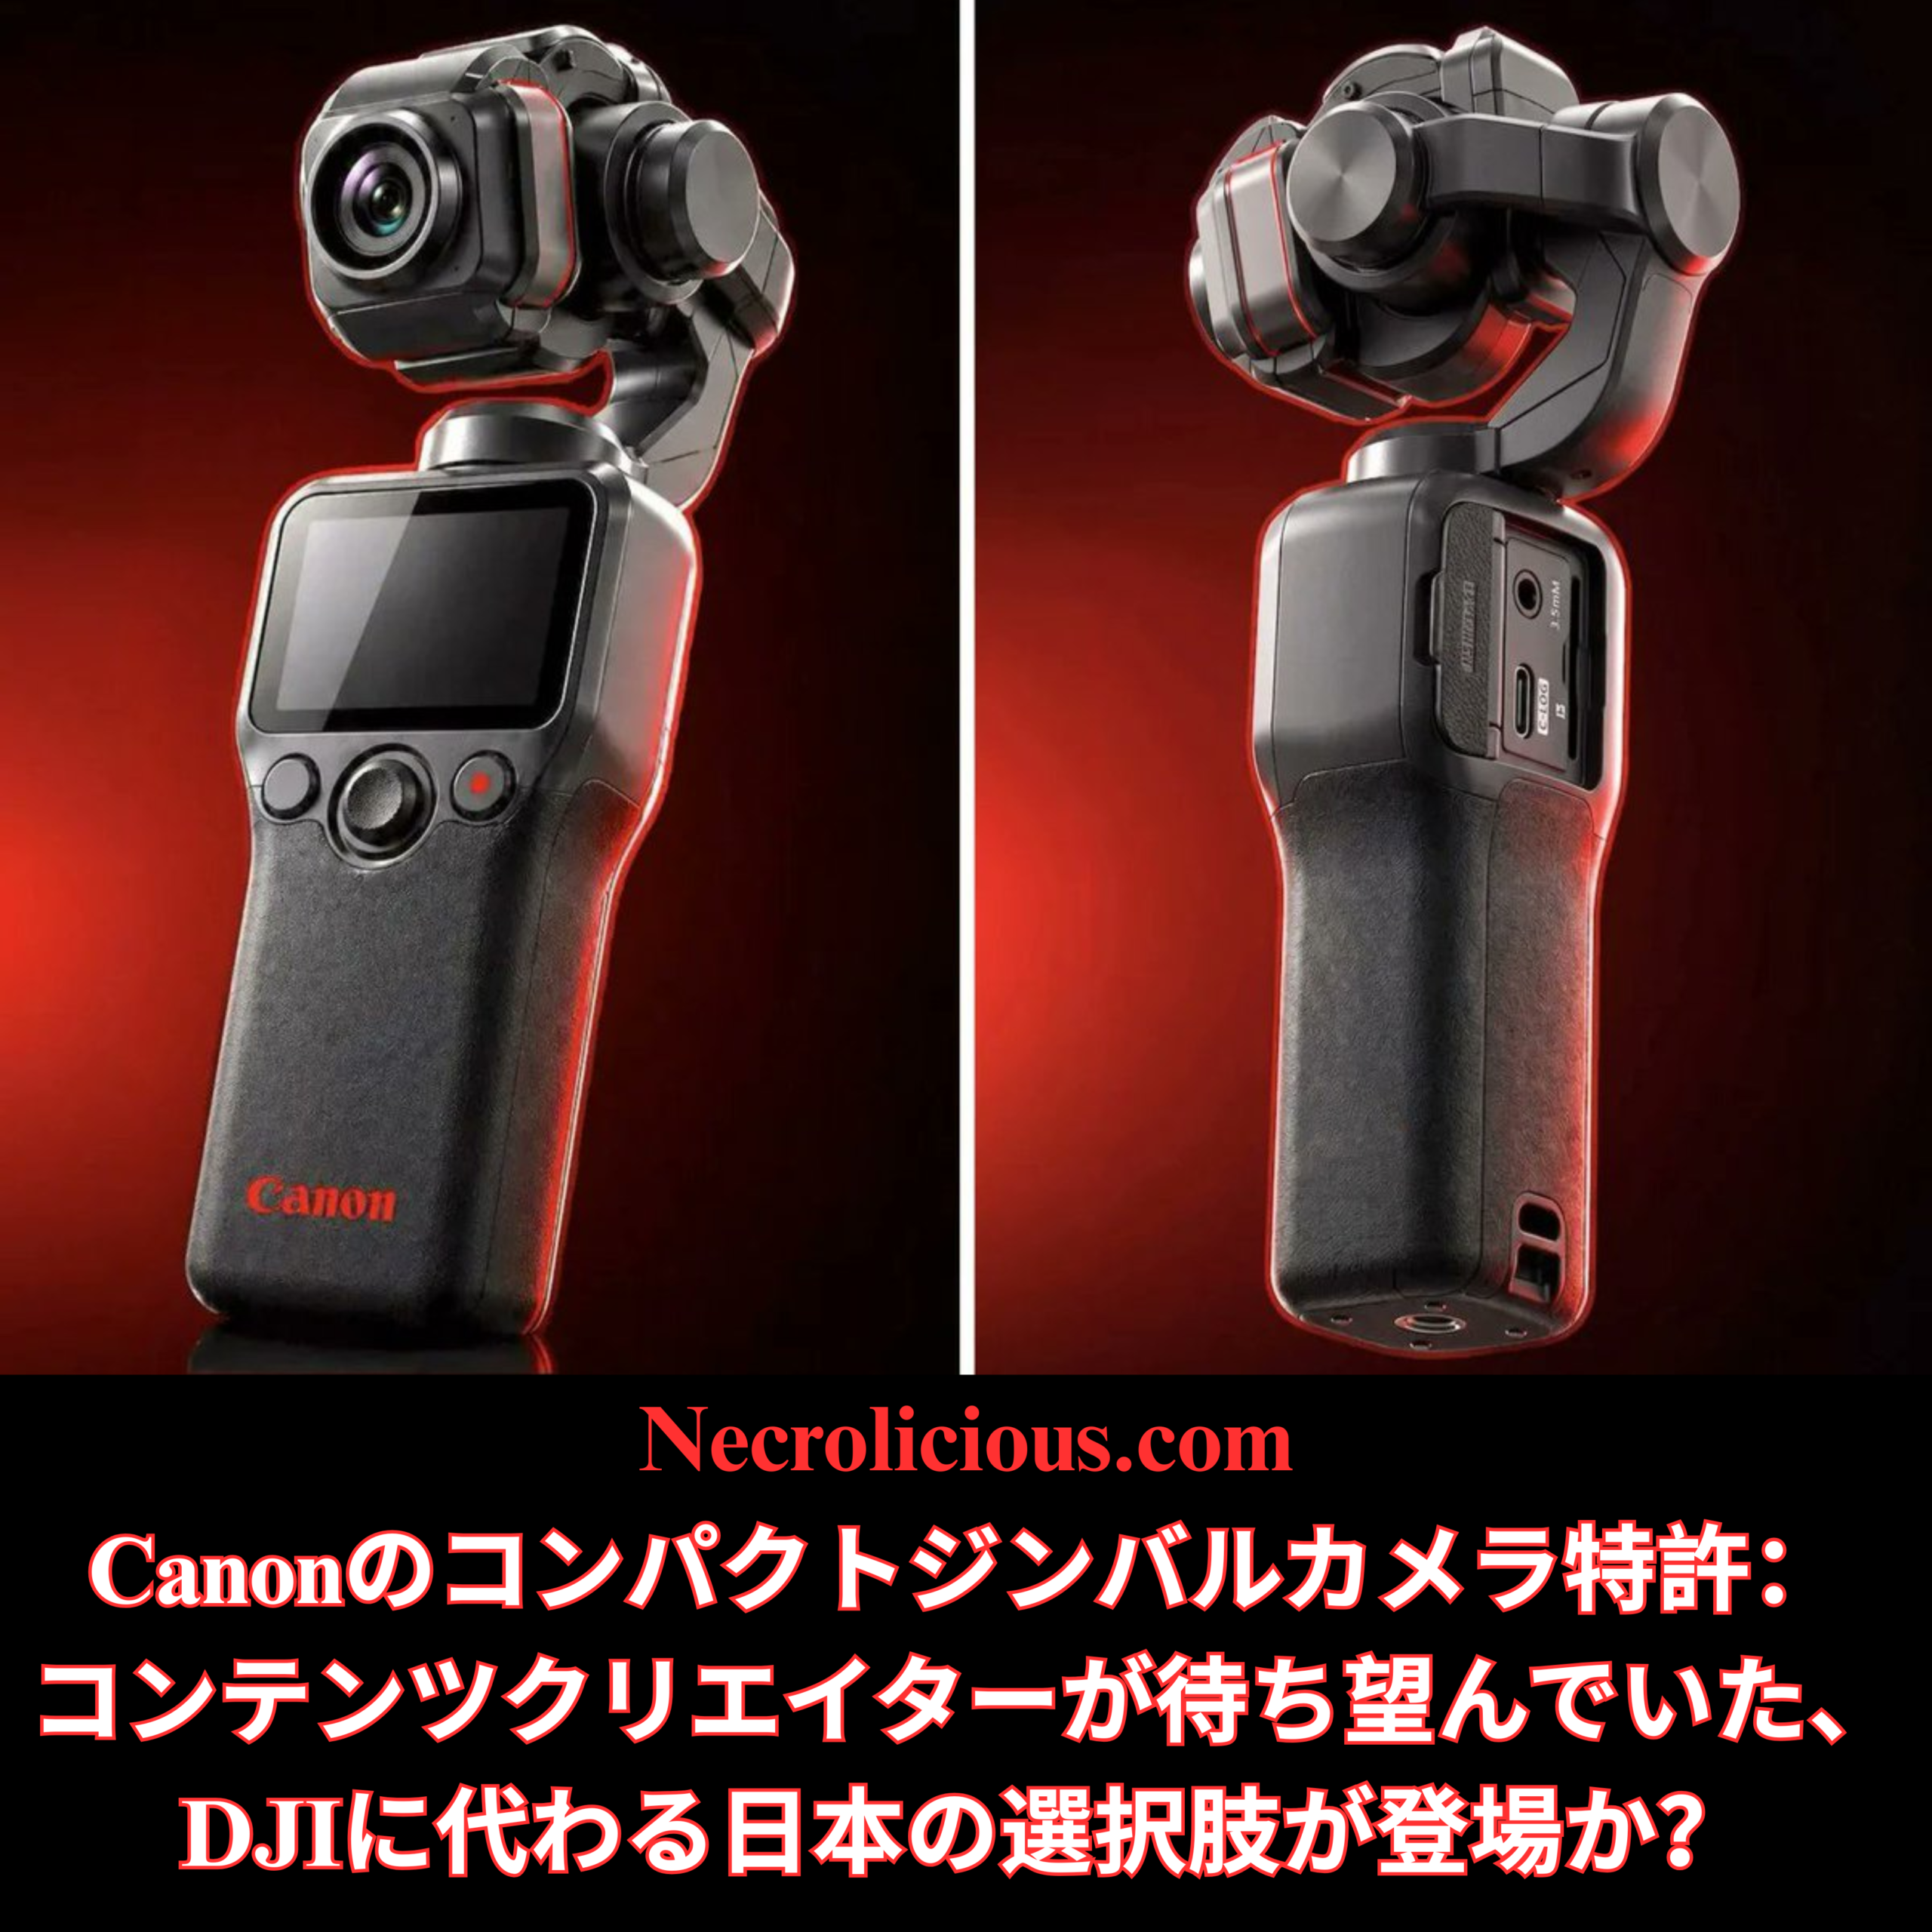
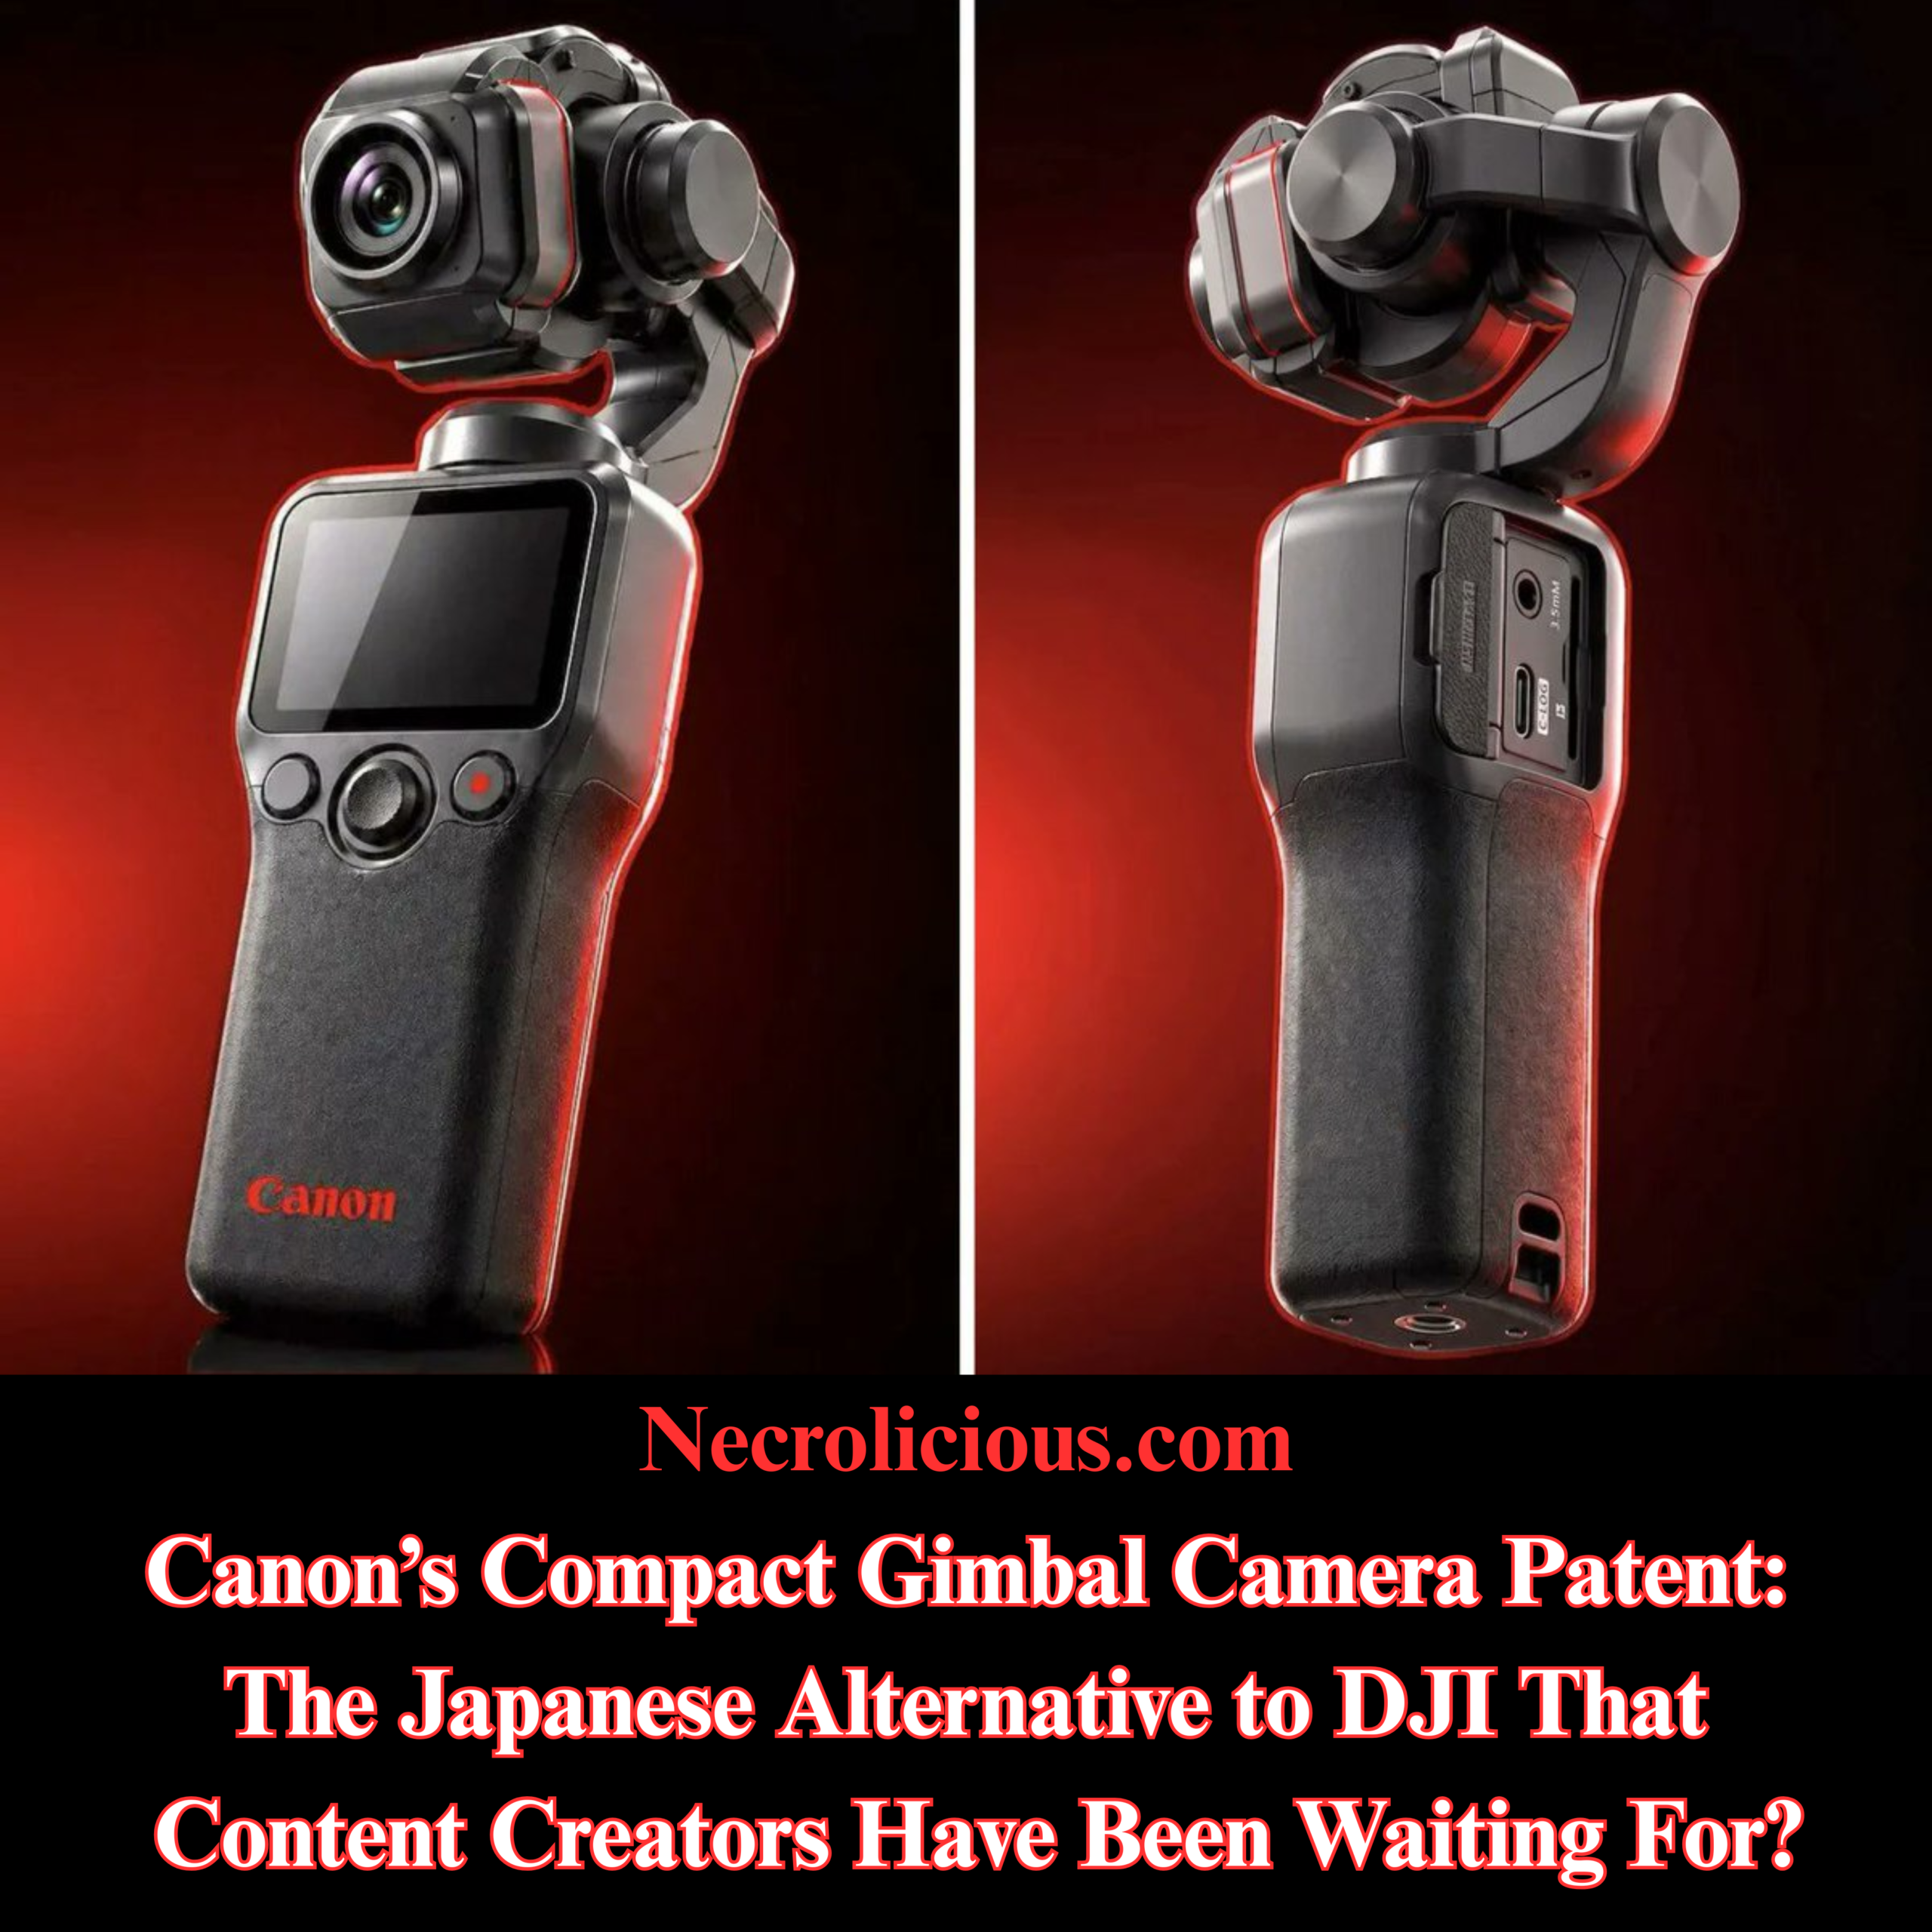
Canon’s recent patent for a compact gimbal camera suggests Japanese manufacturers recognise the gap. Whether they can translate patents into market-ready products quickly enough to challenge DJI remains to be seen.
Practical Advice for Everyday Creators
Test any new smartphone extensively in real-world lighting before relying on it for portraits.
Adjust settings such as HDR or smoothing features to minimise unwanted effects.
Prioritise devices that match your most frequent subjects — typically people rather than scenery.
For social media creators, the combination of convenience & flattering output often outweighs raw technical specifications.
Necrolicious “Photogenic” Funny Nosferatu Vampire Meme 100% Cotton Unisex Tee Buy on Printify
FAQ
How significant is the DJI Osmo Pocket 4’s market performance in Japan? BCN+R data shows it achieved 21.5 percent share in nine days with the Pocket 3 & 4 together nearing 39 percent. DJI’s total category share reached 72.5 percent in April 2026.
Why do iPhone cameras struggle with human faces despite advanced hardware? Aggressive post-processing prioritises sharpness & metrics over natural rendering. This creates orange casts, over-emphasised texture & distortions that affect the daily use case of self & family photography far more than occasional landscape shots.
Does Korean beauty culture influence camera preferences more than in Japan? Yes, the stronger emphasis on pale, glass-like skin in Korea amplifies demand for processing that supports even, luminous complexions. Samsung devices often meet this expectation more readily although the link to camera tuning remains partly speculative.
Is carrying an older iPhone alongside a new one a common practice? It is well documented in South Korea’s “young-tro” trend & echoes preferences in other Asian markets for softer, less processed results from earlier iPhone models.
Should content creators consider a DJI Pocket even if they own a Samsung or iPhone? It depends on priorities. For mechanical stabilisation & efficient video workflows the Pocket series remains superior regardless of phone improvements.
Unless otherwise noted, image assets above are NOT original content & are shared under fair use doctrine with NO claims to authorship or ownership. Contact necrolicious@necrolicious.com for credit or removal.
This post was sponsored by…ME! If you’d like to support, please buy my original meme merchandise or check out my affiliate links to get yourself some other cool things. Additional affiliate links may be contained in the above article. If you click on an affiliate link & sign up/make a purchase, I may earn a commission. This does not increase the price you pay for the product or service, so it helps support this website at no cost to you.
If you would like to support my work more directly, I accept voluntary cryptocurrency donations in BTC, ETH, XRP & XLM sent directly to necrolicious.x. necrolicious.x is an Unstoppable Domains name that resolves to the wallet addresses I have configured. Simply enter necrolicious.x as the recipient in a supported wallet (such as Trust Wallet, Blockchain.com or others that support Unstoppable Domains). Donation Disclaimer: All cryptocurrency donations sent to me are final, voluntary gifts & are non-refundable & irreversible. These donations are not tax-deductible since I am not a registered charitable organization, & no tax receipts will be issued. No memo or destination tag is required for XRP or XLM donations, as the domain resolves directly to a wallet address. By sending a donation you acknowledge & accept all associated risks, including cryptocurrency price volatility, network fees & potential loss of funds due to incorrect network selection or transaction errors. I am not responsible or liable for any loss related to your donation. No goods, services or other benefits are provided in exchange for donations. This is not financial, tax, legal or investment advice. Please consult a qualified professional regarding any implications of your donation.
Content creators who value portability & stabilisation have long relied on one dominant name in the pocket category–DJI. As someone who owns the DJI Pocket 3, Osmo Nano, Mic 3 & (previously) the Mic 2, I remain happy with the DJI brand overall, but I would still prefer to support a Japanese company if comparable products become available.
At present, nothing on the Japanese market matches the ultra-compact convenience of the DJI Pocket line. Traditional Japanese cameras, while outstanding in image quality, are far bulkier. They demand additional lenses, flash attachments & tripods that I neither need nor want for run-and-gun shooting. Canon’s April 2026 patent for a pocket-sized three-axis gimbal camera could change that equation entirely.
The design includes an ergonomic grip, integrated rear screen, fixed lens & intelligent folding mechanism with smart power shutdown. Timed against persistent US restrictions on new Chinese-made creator tools, the filing offers a timely opportunity for Japanese innovation to fill a genuine gap. This development also echoes our recent discussion on the need for a Japanese flagship cell phone to compete effectively with Samsung & Apple.
The Patent Details: Moving Toward a Shelf-Ready Product
April 2026 filings describe a practical, production-oriented unit built around:
Ergonomic grip for comfortable all-day handheld operation
Built-in rear LCD screen for instant framing & review
Fixed lens optimised for quick vlogging & content capture
Automated folding system that protects the gimbal head during storage
Smart power management that senses inactivity through motor resistance, button input or static imagery before shutting down
Earlier concepts from 2021 have evolved into this refined iteration, focusing on real-world usability rather than experimental complexity. The shift signals Canon’s serious intent to enter the compact creator segment.
Why Compact Japanese Innovation Matters to Me & Many Creators
My own setup demonstrates the appeal of the Pocket form factor. The Pocket 3 delivers smooth, stabilised footage in tight spaces without extra bulk. The Osmo Nano & mics complete a lightweight kit ideal for spontaneous POV recording. Yet the preference for Japanese brands runs deeper than personal ownership. Supporting domestic manufacturers strengthens supply-chain resilience & aligns with a broader push for Japanese excellence in consumer tech.
Japanese cameras excel in professional contexts, yet their typical size & accessory requirements make them impractical for the same nimble workflows that drew me to DJI in the first place. A Canon pocket gimbal would bridge that divide, offering optical heritage without the compromises.
Persistent U.S. DJI Restrictions: No Relief from the May 2026 Summit
The US Federal Communications Commission’s December 2025 decision placed foreign-made unmanned aircraft systems & critical components on the Covered List, effectively blocking authorisation for new imports & sales of DJI drones, cameras, microphones. etc.. Existing approved models remain fully legal & available, but future releases face ongoing barriers.
The mid-May 2026 Trump-Xi summit in Beijing delivered modest trade progress on tariffs & select technology areas but produced no concessions on drone or gimbal-camera policy. The FCC restrictions, rooted in national-security provisions of the National Defense Authorization Act, continue unchanged. Commerce Department proposals for broader limits were withdrawn earlier in 2026 ahead of diplomatic talks, yet the core authorisation hurdles for new Chinese-made creator tools persist.
This enduring gap creates space for alternatives from trusted non-restricted partners such as Canon.
Linking to Japan’s Broader Tech Resurgence
My earlier analysis highlighted the strategic importance of Japan reasserting itself in flagship smartphones against Samsung & Apple dominance. Canon’s gimbal patent illustrates the same principle in the mobile gimbal camera space. Rather than broad retreat, Japanese firms can leverage optical expertise & manufacturing precision where compact, user-focused innovation is most needed.
For creators who share my preference for supporting Japanese companies, this represents more than a technical curiosity. It offers a pathway to support Japan’s economy & maintain performance without relying on restricted supply chains.
Opportunity in the Creator Economy
Demand for pocket gimbals shows no signs of slowing across vlogging, live streaming & event coverage. Canon’s proposal could capitalise on:
Proven Japanese reputation for reliability & image quality
Alignment with preferences for diversified, geopolitically stable hardware
Practical features that address everyday pain points such as battery life & storage protection
Challenges around final commercialisation, pricing & software integration remain, yet Canon’s professional video heritage positions the company well to deliver.
How does owning DJI gear influence your view on Canon’s patent? I appreciate the Pocket 3, Osmo Nano, Mic 3 & Mic 2 for their compactness, yet I would welcome a Japanese-made equivalent that delivers similar portability without extra bulk or attachments.
What changed after the May 2026 US-China summit? No relief on FCC restrictions for new DJI models. Existing products remain available, but future imports stay blocked.
Does Japan currently offer any direct Pocket-style competitor? No. Larger Japanese cameras require lenses, flashes & tripods unsuitable for the spontaneous workflows many creators prefer.
When might Canon’s gimbal reach market? Patents suggest possible 2027 timelines, though official confirmation is pending.
Who stands to benefit most? The potential is in place for an all-around win for content creators & Japan’s economy alike.
Unless otherwise noted, image assets above are NOT original content & are shared under fair use doctrine with NO claims to authorship or ownership. Contact necrolicious@necrolicious.com for credit or removal.
This post was sponsored by…ME! If you’d like to support, please buy my original meme merchandise or check out my affiliate links to get yourself some other cool things. Additional affiliate links may be contained in the above article. If you click on an affiliate link & sign up/make a purchase, I may earn a commission. This does not increase the price you pay for the product or service, so it helps support this website at no cost to you.
If you would like to support my work more directly, I accept voluntary cryptocurrency donations in BTC, ETH, XRP & XLM sent directly to necrolicious.x. necrolicious.x is an Unstoppable Domains name that resolves to the wallet addresses I have configured. Simply enter necrolicious.x as the recipient in a supported wallet (such as Trust Wallet, Blockchain.com or others that support Unstoppable Domains). Donation Disclaimer: All cryptocurrency donations sent to me are final, voluntary gifts & are non-refundable & irreversible. These donations are not tax-deductible since I am not a registered charitable organization, & no tax receipts will be issued. No memo or destination tag is required for XRP or XLM donations, as the domain resolves directly to a wallet address. By sending a donation you acknowledge & accept all associated risks, including cryptocurrency price volatility, network fees & potential loss of funds due to incorrect network selection or transaction errors. I am not responsible or liable for any loss related to your donation. No goods, services or other benefits are provided in exchange for donations. This is not financial, tax, legal or investment advice. Please consult a qualified professional regarding any implications of your donation.
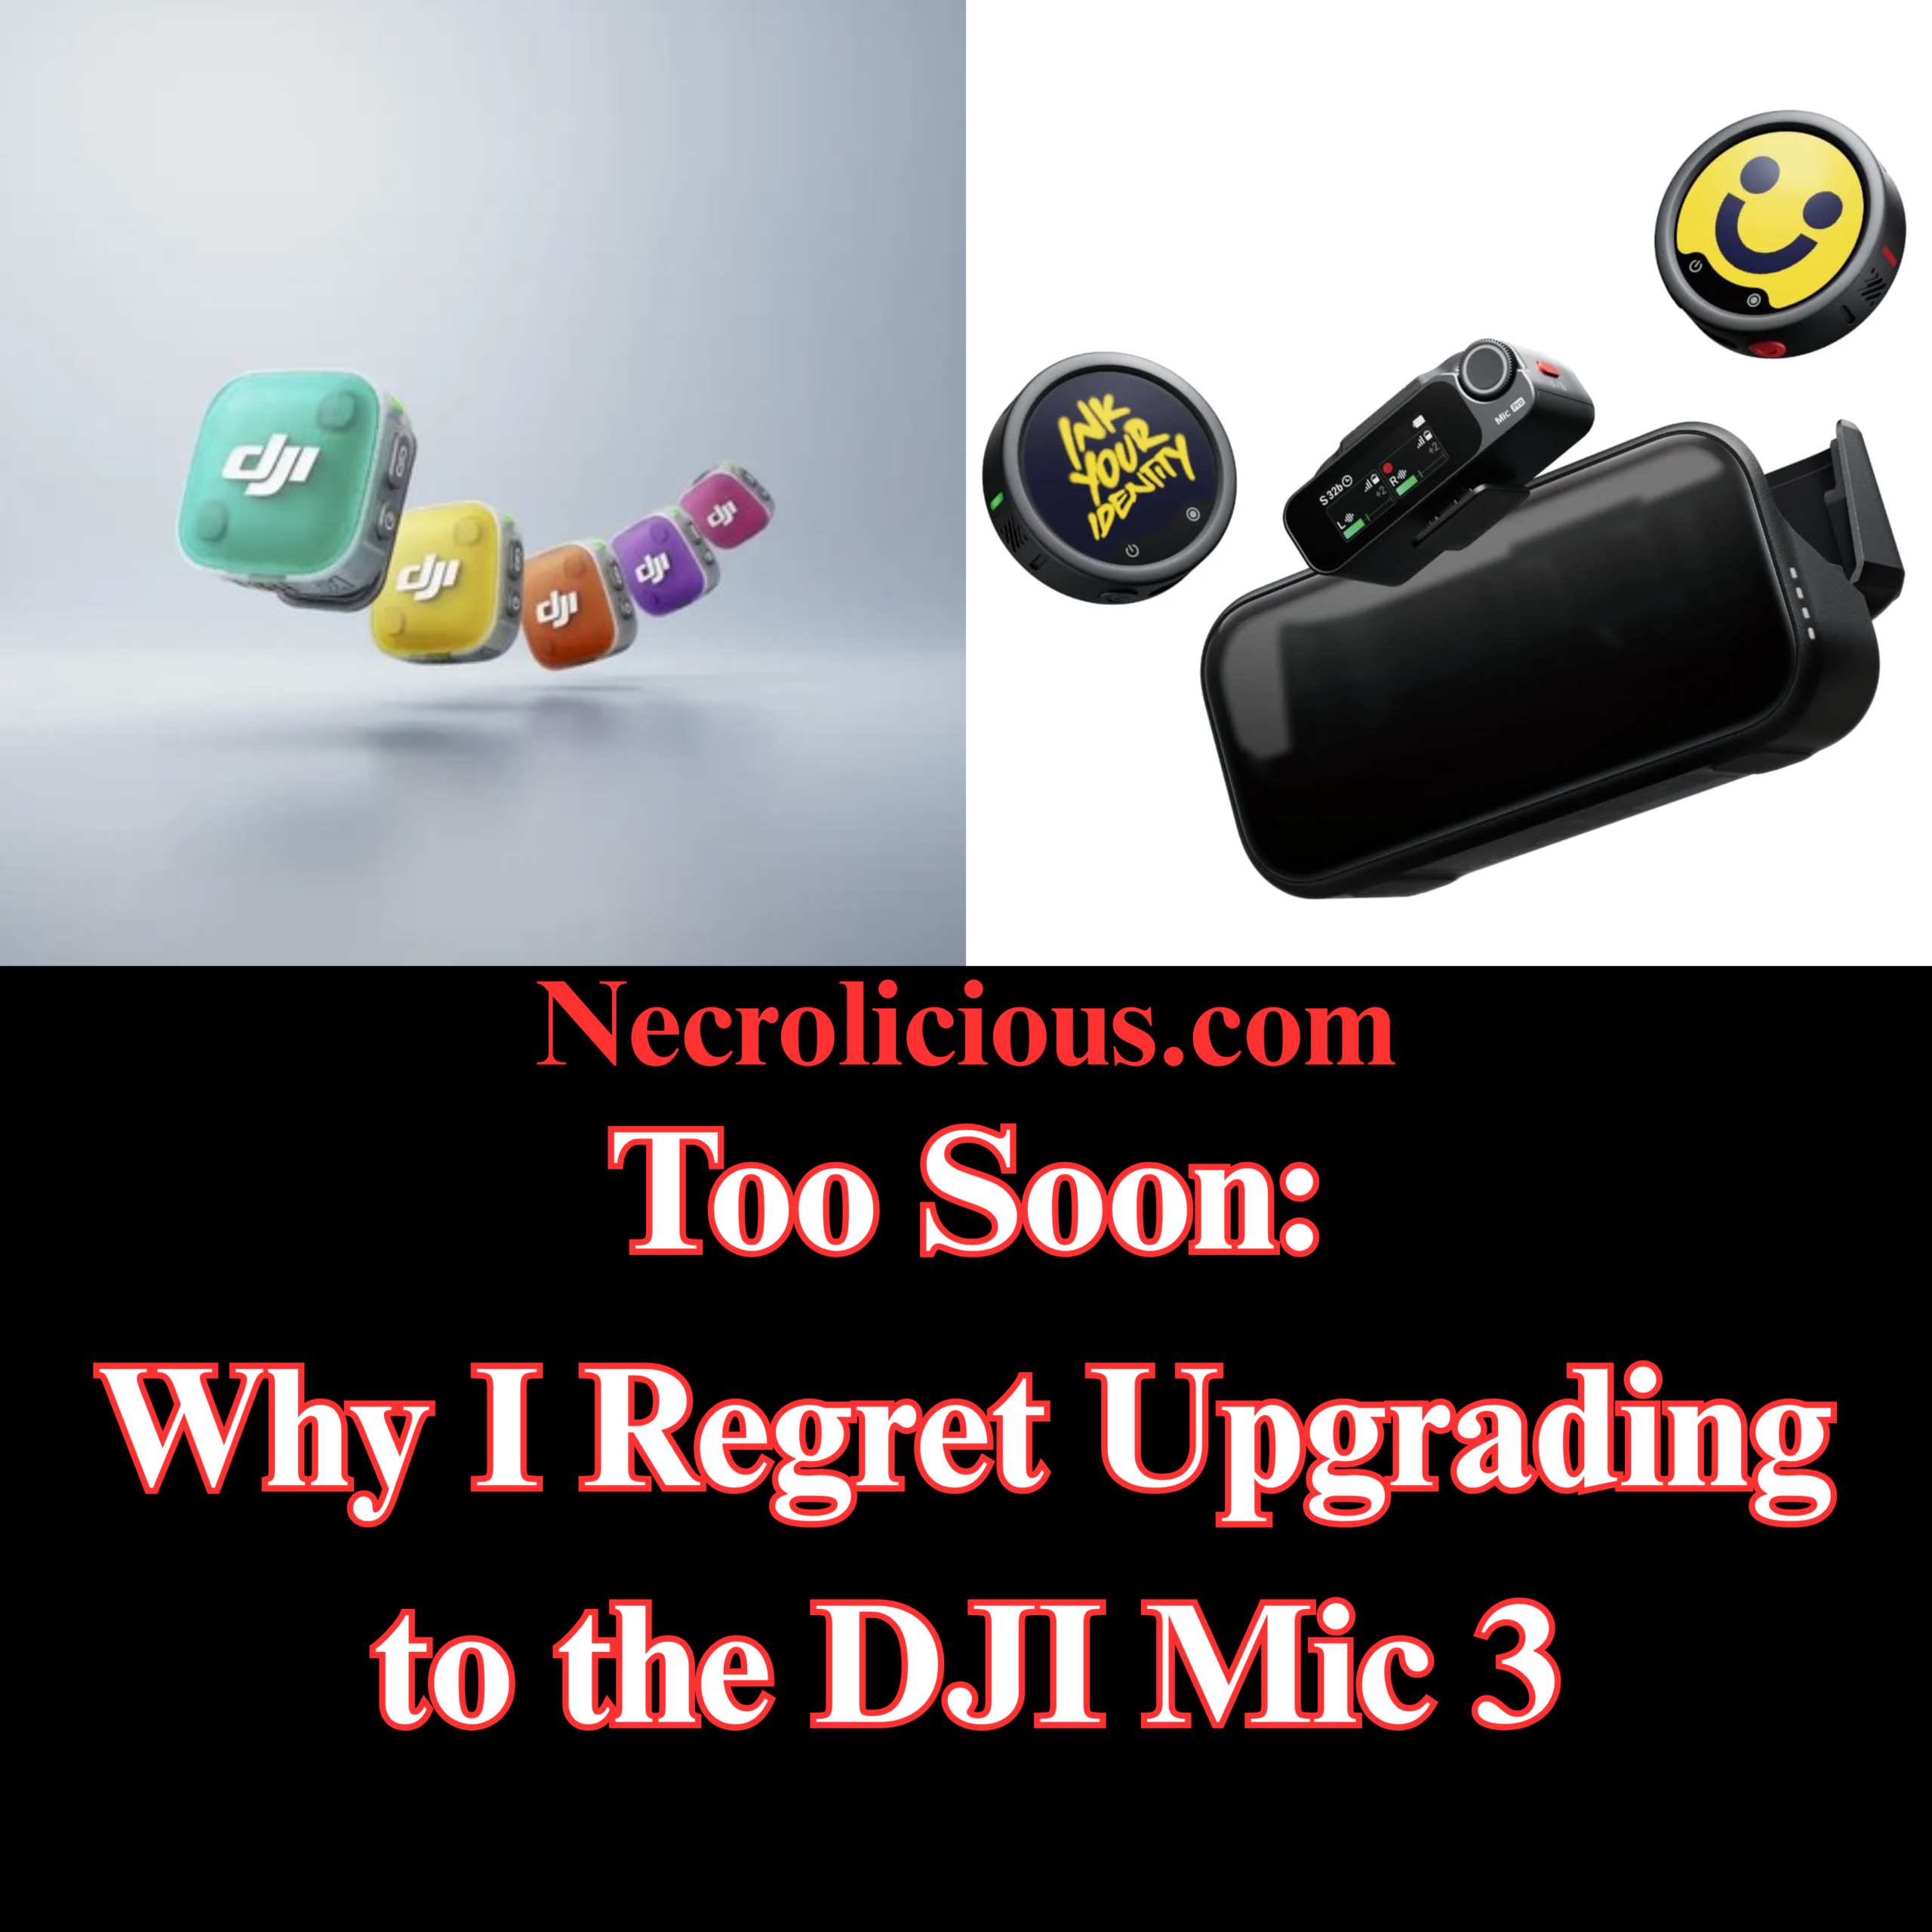
日本からトーク動画を撮影する熱心なコンテンツクリエイターとして、スマートフォンベースのワークフローに適した信頼性の高いワイヤレスオーディオを必要としています。2026年2月、DJI Mic 3にアップグレードしました。これは賢明な選択だと確信していました。特別セール価格とMic 2の売却益を合わせると、実質的に無料でアップグレードできたのです。しかし数週間後、2026年4月28日にDJIがMic Mini 2を発表したことで、すぐに後悔することになりました。
時は流れて2026年4月下旬、DJIはMic Mini 2を発売しました。同等のフルキットは、Mic 3の半額以下で私のワークフローに必要なすべてを提供してくれるので、待っていれば、コンテンツ制作に必要なすべての要素を完全にカバーしながら、かなりの金額を節約できたはずです。
DJIは同時に、2026年夏発売予定のMic Mini 2Sも発表した。この機種はオンボード録音機能を搭載しているが、私自身は使ったことがないものの、必要とする人もいるだろう。DJIにとってこのような短期間での製品発表は目新しいことではないが、近年その傾向が強まっている。熱心なファンは、今日のモデルが明日の後悔につながるかどうかを常に判断しなければならないというプレッシャーにさらされている。
さらに問題を複雑にしているのは、Insta360 が NAB Show 2026 で同時に Mic Pro を発表したことです。際立った特徴は、各送信機にカスタマイズ可能な E インク ディスプレイが搭載されていることです。私を含め多くのクリエイターは、特にスポンサーではないブランドの場合、機材に目立つブランド ロゴが付いていることを好みません。Insta360 のソリューションでは、ユーザーが自分のロゴ、名前、またはアートワークを表示してパーソナル ブランディングを行うことができます。Mic Mini 2 の交換可能なマグネット式フェイスプレートは色の変更が可能ですが、E インクのようなブランディングの柔軟性はありません。この記事を書いている時点では、重要な詳細はまだ不明です。ディスプレイの目立ち具合、バックライト オプション、色の制限は不明です。それでも、このコンセプトは私にとって魅力的です。私はPocket 3とNanoカメラ、そして Mic 3 を所有しており、DJI のエコシステムにかなり深く関わっていますが、私の主なセットアップは DJI カメラではなくスマートフォンを使用しているため、Insta360 Mic Pro を統合しても私のプロセスは中断されません。私はこれまでInsta360製品を所有したことはありませんが、このPro Micは歓迎すべき変化であり、詳細な仕様が分かり次第、ぜひ試してみたいと思っています。
色、ブランディング、そして大切なパーソナルなタッチ
緑は私の好きな色です。Mic Mini 2には鮮やかな緑色のフェイスプレートが付属しており、さらに交換可能なマグネット式カバーが虹色に並んでいますが、私はあまり興味がなく、使う機会もありません。あの鮮やかな色はカメラ映えしたでしょう。Mic 3はシンプルな黒のままです。Mic 2用のシリコンスキンは存在しますが、日本ではMic 3用のものは簡単には手に入りません。カバーを3Dプリントすることは理論的には可能ですが、コストと手間を考えると現実的ではありません。
初代Mic Miniが発売された時、少し検討しましたが、クリップが小さかったため、私が愛用しているマイクホルダーと互換性がありませんでした。そのホルダーはMic 2とMic 3の両方と問題なく動作します。プロモーション資料を見る限り、Mic Mini 2はMic 3と同じサイズのクリップを採用しているようです。もしそうであれば、互換性の問題は解決するでしょう。
Mic 3を返品することはもうできません。Mic Mini 2を購入することで得られるはずだった節約額は、Mic 3を売って差額を懐に入れる手間よりも大きいので、このまま使い続け、現在必要のない高度な機能がいつか必要になることを期待します。それに、Mic 3の黒い仕上げは、私がよく使う緑色の字幕に多少はマッチしますが、緑色のマイクだと字幕が隠れてしまうかもしれません。Insta360 Mic Proはブランディング実験に使えるので興味はありますが、Mic 3は依然として非常に高性能なツールであり、むしろオーバースペックと言えるほどです。後悔しているのはタイミングであって、品質のせいではありません。
DJI Mic 3は2026年になってもまだ買う価値があるでしょうか? タイムコード、4台の送信機対応、プロ仕様のマルチカメラ撮影に必要な32GBのストレージ容量などを求めるなら、確かに価値があります。しかし、ほとんどのトーク番組やVlog制作者にとっては、Mic Mini 2の方がコストパフォーマンスに優れています。
Mic Mini 2Sの発売を待つべきでしょうか? 内蔵録音機能が必須であれば、2026年夏発売予定のモデルが望ましいかもしれません。そうでなければ、現行のMic Mini 2で日常的なニーズの大部分は既に満たされています。
Insta360 Mic Proは、ブランディングの面で他社製品と比べてどうでしょうか? Eインクディスプレイを採用しているため、物理的なカバーなしでカスタムロゴを表示でき、よくある課題を解決します。詳細はまだ発表されていませんが、初期のプレビューを見る限り、ビジュアル重視のクリエイターにとって有望な製品と言えるでしょう。
As a dedicated content creator filming talking-head videos from Japan, I rely on reliable wireless audio that fits my phone-based workflow. In February 2026, I upgraded to the DJI Mic 3, convinced it was the smart move. A special sale price combined with proceeds from selling my Mic 2 made the step up essentially free. Yet weeks later DJI announced the Mic Mini 2 on 28 April 2026, triggering immediate buyer’s remorse.
This is not another generic comparison. It is my honest, first-hand account as an enthusiast who has tested the Mic 3 extensively alongside my existing DJI ecosystem (Osmo Pocket 3, Nano & phone camera setups). I examine the decision-making process, real-world performance, the broader industry context of rapid releases & what fellow creators should consider before committing to any wireless microphone in 2026 & beyond.
Why I Bought the DJI Mic 3
The purchase felt logical at the time. Each transmitter offered 32 GB of internal storage compared with the Mic 2’s 8 GB per unit. With rumours of an impending DRAM shortage I wanted to secure the higher-spec model before any price increase. The Mic 3 also delivered pro features I assumed would future-proof my setup: timecode support, capacity for up to four transmitters on one receiver & 32-bit float dual recording.
By taking advantage of some sale promotions & selling off my Mic 2 set, my upgrade was, I thought, an essentially free, zero-risk improvement for my talking-head content.
The Announcement That Changed Everything
Fast-forward to late April 2026 & DJI released the Mic Mini 2. At The equivalent full kit delivers everything I actually need for my workflow at less than half the price of the Mic 3, so if I had waited I could have pocketed a significant chunk of change while still having complete coverage of all the bases of my content creation needs.
DJI simultaneously teased the Mic Mini 2S, due summer 2026, which adds onboard recording, which I personally have never used, but some may need. This pattern of rapid launches is not new to DJI but it has intensified lately. Dedicated fans now face constant pressure to decide whether today’s model will be tomorrow’s regret.
Compounding the issue, Insta360 announced its Mic Pro at the same time during NAB Show 2026. The standout feature is a customisable E-ink display on each transmitter. Many creators, myself included, dislike prominent brand logos on gear, especially when the brand is not a sponsor. The Insta360 solution lets users display their own logo, name or artwork for personal branding. While the Mic Mini 2’s swappable magnetic faceplates allow colour changes, they lack the branding flexibility of E-ink. Key details remain unavailable as of this writing: display prominence, backlighting options & colour restrictions are unclear. Still, the concept appeals to me. I am fairly deep in the DJI ecosystem — with the Pocket 3 & Nano cameras alongside my Mic 3 — yet my primary setup uses my phone rather than my DJI cameras, so integrating the Insta360 Mic Pro would not disrupt my process. Though I have never owned any Insta360 products, this Pro Mic would be a welcome change & I hope to test it when full specifications arrive.
Colour, Branding & the Personal Touches That Matter
Green is my favourite colour. The Mic Mini 2 ships with a vibrant green faceplate option plus a rainbow of additional swappable magnetic covers that I have little interest in or use for. That pop of colour would have been nice on camera. The Mic 3 remains plain black. Silicone skins exist for the Mic 2 but none are readily available for the Mic 3 in Japan. 3D-printing a cover is theoretically possible yet impractical given the cost & effort involved.
I briefly considered the original Mic Mini when it launched but its smaller clip was incompatible with my preferred microphone holder, which works seamlessly with both the Mic 2 & Mic 3. Judging by promotional content alone, Mic Mini 2 seems like it has the same sized clip as the Mic 3. If so, that would resolve the compatibility issue.
First-Hand Performance: Mic 3 in Real Use
I have used the Mic 3 extensively since purchase for dozens of talking-head recording sessions. Sound quality is outstanding: clean, reliable & free of the occasional popping & one-second lag I experienced with the Mic 2 when editing in the Mimo app. Connection stability is rock-solid.
The only noticeable downgrade is the carrying case, which feels noticeably flimsier & less metal than the heavier, sturdier case supplied with the Mic 2. None of these real-world strengths, however, justify the premium price when the Mic Mini 2 meets my needs.
Why DJI’s Release Cadence Frustrates Even Loyal Users
DJI has built a dominant position in consumer wireless audio through iterative innovation, yet the pace now risks alienating enthusiasts. The Mic 3 arrived with meaningful upgrades over the Mic 2 (lighter transmitters at 16 g versus 28 g, improved battery life & advanced processing). Yet the Mic Mini 2 undercuts it on price & weight while retaining cross-compatibility across the ecosystem. For creators, the constant churn forces difficult choices: buy now & risk obsolescence, or wait & miss current opportunities.
This mirrors broader tech trends where rapid iteration benefits manufacturers more than end users. Historical parallels exist in early digital audio recorders & the shift to 2.4 GHz wireless systems, but DJI’s frequency has accelerated. Practical takeaway: monitor official announcements closely & assess whether pro features (timecode, multi-transmitter support, 32 GB storage) align with your actual workflow before purchasing.
Side-by-Side Specification Comparison
To aid decision-making, here is a clear comparison of the four main DJI models based on current official specifications & MSRP for the standard full kit (2 TX + 1 RX + charging case). The Insta360 Mic Pro is excluded from the table because detailed specifications remain unavailable as of this writing.
Feature
DJI Mic Mini (Original)
DJI Mic 2
DJI Mic 3
DJI Mic Mini 2
Current MSRP (full kit)
$99
$199
$259
$99
Transmitter Weight
10 g
28 g
16 g
11 g
Internal Storage (per TX)
None
8 GB
32 GB
None (Mic Mini 2S adds this)
Onboard Recording
No
Yes (24-bit / 32-bit)
Yes (dual-file 32-bit float)
No
32-bit Float Dual Recording
No
Yes
Yes
No (app-based safety track only)
Timecode Support
No
No
Yes
No
Max Transmitters
2
2
4
2 (cross-compatible with Mic 3 ecosystem)
Voice Tone Presets
None
None
3
3 (Regular, Rich, Bright)
Noise Cancellation
Yes
Yes
2-level
2-level
Colour Options
Limited
Black
Black
Swappable magnetic covers (black, white + 8 colours/rainbow options)
Clip/Mounting
Smaller clip (incompatible with some holders)
Compatible with my holder
Compatible with my holder
Magnetic, rotatable, fits my holder(?)
Transmission Range
400 m
~400 m
~400 m
400 m (standard RX)
Battery Life (TX)
~11.5 hours
6 hours
8 hours
11.5 hours
Practical Takeaways for Creators
Match features to workflow. If you produce straightforward talking-head or mobile-filmed content, the Mic Mini 2’s lighter weight, longer battery life & lower price deliver superior value.
Factor in branding needs. For content where visual cohesion matters, evaluate E-ink options like the Insta360 Mic Pro alongside colour-swappable systems.
Monitor release cycles. DJI’s pattern suggests new variants appear every few months. Set calendar alerts for official channels.
Test compatibility early. My microphone holder experience highlights the importance of verifying mounts before purchase.
Consider ecosystem lock-in. Cross-compatibility across DJI Mic models is a strength, yet it can also trap users in incremental upgrades.
What I Am Doing Next
Returning the Mic 3 is no longer possible the savings I would have had by buying the Mic Mini 2 is greater than the effort of selling the Mic 3 to pocket the difference at this point, so I will just continue using it & hope that the more advanced features I currently have no need for become necessary at some point. Besides, the Mic 3’s black finish somewhat complements my frequently green captions whereas a green microphone may obscure them. I remain curious about the Insta360 Mic Pro for branding experiments, but the Mic 3 remains a vastly capable tool–to the point of overkill; my regret stems from timing, not at all the quality.
Internal links for further reading on necrolicious.com:
Is the DJI Mic 3 still worth buying in 2026? Yes, if you need timecode, four-transmitter support or 32 GB storage for professional multi-camera work. For most talking-head & vlogging creators the Mic Mini 2 offers better value.
Should I wait for the Mic Mini 2S? If onboard recording is essential, the summer 2026 release may be preferable. Otherwise the current Mic Mini 2 already satisfies the majority of everyday needs.
How does the Insta360 Mic Pro compare for branding? Its E-ink display enables custom logos without physical covers, solving a common pain point. Full details are pending but early previews are promising for visually focused creators.
Lesson learned: even careful research cannot fully anticipate rapid product cycles. For fellow creators the key is aligning purchases with genuine workflow requirements rather than chasing every new specification. Hindsight may be 20/20 but informed patience remains a decent strategy.
Necrolicious “Abundant” Funny Luxury Skeleton Skull Meme 100% Cotton Unisex Tee Buy on Printify
Unless otherwise noted, image assets above are NOT original content & are shared under fair use doctrine with NO claims to authorship or ownership. Contact necrolicious@necrolicious.com for credit or removal.
This post was sponsored by…ME! If you’d like to support, please buy my original meme merchandise or check out my affiliate links to get yourself some other cool things. Additional affiliate links may be contained in the above article. If you click on an affiliate link & sign up/make a purchase, I may earn a commission. This does not increase the price you pay for the product or service, so it helps support this website at no cost to you.
If you would like to support my work more directly, I accept voluntary cryptocurrency donations in BTC, ETH, XRP & XLM sent directly to necrolicious.x. necrolicious.x is an Unstoppable Domains name that resolves to the wallet addresses I have configured. Simply enter necrolicious.x as the recipient in a supported wallet (such as Trust Wallet, Blockchain.com or others that support Unstoppable Domains). Donation Disclaimer: All cryptocurrency donations sent to me are final, voluntary gifts & are non-refundable & irreversible. These donations are not tax-deductible since I am not a registered charitable organization, & no tax receipts will be issued. No memo or destination tag is required for XRP or XLM donations, as the domain resolves directly to a wallet address. By sending a donation you acknowledge & accept all associated risks, including cryptocurrency price volatility, network fees & potential loss of funds due to incorrect network selection or transaction errors. I am not responsible or liable for any loss related to your donation. No goods, services or other benefits are provided in exchange for donations. This is not financial, tax, legal or investment advice. Please consult a qualified professional regarding any implications of your donation.
DJIの「More Than Sound」ティザーは、2026年4月14日の公開以来、コンテンツクリエイターやオーディオ愛好家の注目を集めています。虹色のパレットで渦巻く花びらのような形を特徴とする抽象的なアニメーションは、鮮やかなデザイン要素を備えた新しいワイヤレスマイクシステムを強く示唆していました。そのわずか数日後、公式イベントの1週間前に、具体的なリーク情報によって製品の正体が明らかになりました。それは、複数の色から選べる公式の交換可能なマグネット式フェイスプレートを備えたDJI Mic Mini 2です。
規制当局への提出書類が、最初の確かな証拠となった。FCCデータベースのDMMT02モデルのエントリには、DJI Mic Mini 2が明記されており、4月28日の発売時期と関連付けられていた。関連するミドルレンジモデルであるMic Mini 2S(DMMT03)も、米国での認証が取り消される前に一時的に登場していた。これらの文書は、フラッグシップモデルであるMic 3の刷新ではなく、コンパクトで手頃な価格の初代Mic Miniの後継機種であるというコミュニティの期待と完全に一致していた。DJIの他の最近の製品発表と同様に、この新しいマイクセットが米国で購入可能かどうかは依然として不明である。
YouTubeの開封動画が全貌を明らかにする
https://youtu.be/C1gqq7r8zDo?si=D4wgAlLM-MHBXEXN
ここ数時間のうちに、独立系クリエイターたちが、疑念を払拭するような初期のハンズオン映像を公開しました。Kingmi Mobileの「DJI Mic Mini 2 開封キット&ハンズオンレビュー」とCJ Aerialの「DJI Mic Mini 2 をご紹介」というタイトルの動画では、黒色の充電ケースと、ホットピンク、オレンジ、イエロー、グリーン、シアン、ブルー、パープルの7つの鮮やかなマグネットパーツが入った専用の白いアクセサリートレイが紹介されています。これらはサードパーティ製のシリコンスキンや永久的に着色された本体ではなく、DJIの公式10ピースマグネット式フェイスプレートシステムの一部であり、ユーザーは服装や撮影環境に合わせてカバーを瞬時に交換できます。
開封レビューによると、DJI Mic Mini 2は前モデルの超軽量フォームファクターを維持しつつ、瞬時にEQ調整が可能なボーカルトーンプリセット、バッテリー寿命の向上、柔軟なUSB-Cレシーバーオプションなど、実用的なアップグレードが追加されていることが確認できる。価格設定も競争力があり、マルチトランスミッターキットはVloggerやモバイルクリエイターにとって手頃な価格帯となっているようだ。
香港製品ページ Ghost Data
展開に関して特に興味深い点の一つは、XのAIであるGrokに詳細を尋ねた際に発生した。Grokは、香港のDJI公式サイトからの情報漏洩/早期発売について具体的に言及した。しかし、私がそのページへのリンクを尋ねて自分で確認しようとしたところ、そのようなページは存在しないことが判明した。GrokがDJI公式サイトでの早期情報漏洩の存在を完全に妄想していたのか、それとも実際に情報漏洩があったものの、その後削除されたのかは不明である。いずれにせよ、この記事執筆時点では、香港を含むどの地域のDJI公式サイトにもMic Mini 2は掲載されていない。
グローバルローンチで期待できること
専用イベント「More Than Sound」は2026年4月28日午前8時(米国東部時間)に予定されているが、香港での先行販売により、愛好家は構成やカラーオプションをいち早く確認できる。DJIはこれまでも地域限定ストアを利用して、本格的な展開前に需要をテストしてきたため、今回のリストはグローバルな価格設定やバンドル内容の信頼できるプレビューとなる。
マグネット式カスタマイズシステム、改良されたオーディオ機能、そして手頃な価格設定など、DJI Mic Mini 2は、実用的かつ視覚的にも特徴的な方法で、DJIのクリエイター向けオーディオエコシステムを拡大する製品となるでしょう。公式イベントが近づくにつれ、詳細が明らかになるにつれ、確定したハードウェア革新と地域限定の早期アクセスという組み合わせは、既存のMicシリーズユーザーと、多用途なワイヤレスオーディオソリューションを求める新規ユーザーの両方にとって魅力的なものとなることが確実視されています。
DJI’s “More Than Sound” teaser has captured the attention of content creators & audio enthusiasts since its release on 14 April 2026. The abstract animation featuring swirling petal-like shapes in a rainbow palette strongly suggested a fresh wireless microphone system with vibrant design elements. Just days later, a full week ahead of the official event, concrete leaks have clarified the product identity: the DJI Mic Mini 2, complete with official interchangeable magnetic faceplates in multiple colours.
From Teaser Speculation to FCC Confirmation
The initial online promotion had me weighing two main possibilities. I had wondered whether DJI would simply release a range of coloured silicone skins for the existing Mic Mini, noting that third-party options already existed in abundance. However, drawing parallels with Rode’s strategy of offering standard microphones in permanent colour variants, I equally anticipated new hardware in several hues. The colourful butterfly motif in the teaser video fuelled the latter view, but no official product imagery appeared at the time.
Regulatory filings provided the first solid evidence. FCC database entries for model DMMT02 explicitly referenced the DJI Mic Mini 2 & tied it to the April 28 launch window. A related mid-tier variant, the Mic Mini 2S (DMMT03), also surfaced briefly before its US certification was withdrawn. These documents aligned perfectly with community expectations of a compact, budget-friendly successor to the original Mic Mini rather than a flagship Mic 3 refresh. As with DJI’s other most recent launches, it remains unclear whether this new mic set will be available for purchase in the US or not.
YouTube Unboxings Reveal the Full Picture
Within the past few hours, independent creators have shared early hands-on footage that removes all doubt. Videos titled “DJI Mic Mini 2 Unboxing Kit & Hands-On Review” from Kingmi Mobile & “Meet DJI Mic Mini 2” from CJ Aerial showcase the black charging case alongside a dedicated white accessory tray holding seven vibrant magnetic pieces: hot pink, orange, yellow, green, cyan, blue & purple. These are not third-party silicone skins or permanent coloured bodies. Instead, they form part of DJI’s official ten-piece magnetic faceplate system, allowing users to swap covers instantly to match outfits or filming environments.
The unboxings confirm the DJI Mic Mini 2 retains the ultralight form factor of its predecessor while adding practical upgrades such as Vocal Tone presets for instant EQ adjustments, enhanced battery life & flexible USB-C receiver options. Pricing appears competitive, with multi-transmitter kits positioned accessibly for vloggers & mobile creators.
The Hong Kong Product Page Ghost Data
One particularly curious element of the rollout occurred when I asked X’s AI, Grok, for further details on this. It specifically mentioned a leak/early launch from the official Hong Kong DJI website. However, when I asked for a link to review the page myself, it could find evidence of no such page. It is not clear if Grok entirely hallucinated the existence of the early on. Leak on the official DJI website or if it actually happened, but was subsequently cleaned up. Either way, no Hong Kong or any other region of DJI’s website currently displays the Mic Mini 2 as of this writing.
What to Expect from the Global Launch
With the dedicated “More Than Sound” event still set for 28 April 2026 at 8 AM EDT, the early Hong Kong availability offers enthusiasts a head start on reviewing configurations & colour options. DJI has historically used regional stores to test demand before wider rollouts, so the current listing provides a reliable preview of global pricing & bundles.
Whether the focus is on the magnetic customisation system, improved audio features or the accessible price point, the DJI Mic Mini 2 looks set to expand DJI’s creator audio ecosystem in a practical & visually distinctive manner. As more details emerge closer to the official event, the combination of confirmed hardware innovations & regional early access ensures this launch will appeal to both existing Mic series users & newcomers seeking versatile wireless audio solutions.
Unless otherwise noted, image assets above are NOT original content & are shared under fair use doctrine with NO claims to authorship or ownership. Contact necrolicious@necrolicious.com for credit or removal.
This post was sponsored by…ME! If you’d like to support, please buy my original meme merchandise or check out my affiliate links to get yourself some other cool things. Additional affiliate links may be contained in the above article. If you click on an affiliate link & sign up/make a purchase, I may earn a commission. This does not increase the price you pay for the product or service, so it helps support this website at no cost to you.
If you would like to support my work more directly, I accept voluntary cryptocurrency donations in BTC, ETH, XRP & XLM sent directly to necrolicious.x. necrolicious.x is an Unstoppable Domains name that resolves to the wallet addresses I have configured. Simply enter necrolicious.x as the recipient in a supported wallet (such as Trust Wallet, Blockchain.com or others that support Unstoppable Domains). Donation Disclaimer: All cryptocurrency donations sent to me are final, voluntary gifts & are non-refundable & irreversible. These donations are not tax-deductible since I am not a registered charitable organization, & no tax receipts will be issued. No memo or destination tag is required for XRP or XLM donations, as the domain resolves directly to a wallet address. By sending a donation you acknowledge & accept all associated risks, including cryptocurrency price volatility, network fees & potential loss of funds due to incorrect network selection or transaction errors. I am not responsible or liable for any loss related to your donation. No goods, services or other benefits are provided in exchange for donations. This is not financial, tax, legal or investment advice. Please consult a qualified professional regarding any implications of your donation.
Share this:
Cookie Consent
We use cookies to improve your experience on our site. By using our site, you consent to cookies.
Registers a unique ID on mobile devices to enable tracking based on geographical GPS location.
1 day
VISITOR_INFO1_LIVE
Tries to estimate the users' bandwidth on pages with integrated YouTube videos. Also used for marketing
179 days
PREF
This cookie stores your preferences and other information, in particular preferred language, how many search results you wish to be shown on your page, and whether or not you wish to have Google’s SafeSearch filter turned on.
10 years from set/ update
YSC
Registers a unique ID to keep statistics of what videos from YouTube the user has seen.
Session
DEVICE_INFO
Used to detect if the visitor has accepted the marketing category in the cookie banner. This cookie is necessary for GDPR-compliance of the website.
179 days
LOGIN_INFO
This cookie is used to play YouTube videos embedded on the website.