I was always very satisfied with my DJI Mic 2 & probably would not have upgraded to the Mic 3, were it not for the current 14% off sale which continues until February 10th (2026). Since the Mic 3 became 14% off & I got an additional 2,828 Rakuten points for the purchase, it just made sense to sell off my Mic 2 & buy to the Mic 3 — the sale basically made it free for me to upgrade! But that’s not the only reason I upgraded from the DJI Mic 2 to the DJI Mic 3. There are several other reasons, which I will delve into in this article, so you can be better informed about your own decision as to whether or not to upgrade from a prior-generation DJI Microphone. Without further ado, here are my reasons:

Memory Supply Crunch Threatening Repricing
There is also the matter of the memory supply crunch which will be affecting technology for at least the next couple of years. I have written my own reports on this topic, but I am not the only one ringing the alarm bell to get what devices you can before major repricing; other well-respected technological news outlets are now reporting similar cautions, urging people to buy a Nintendo Switch 2 now before a global repricing occurs. I don’t think this will remain specific to the Nintendo Switch 2 alone, but rather ANY device which has memory components, such as the Mic 3. This crunch stems from ongoing global supply chain issues & increased demand for AI-driven devices which could drive up prices for memory-intensive products like the Mic 3’s expanded 32GB storage. If you are eyeing an upgrade, acting soon might avoid future cost hikes similar to those anticipated for gaming consoles & smartphones.
Enhanced On-Board Memory & Related Features
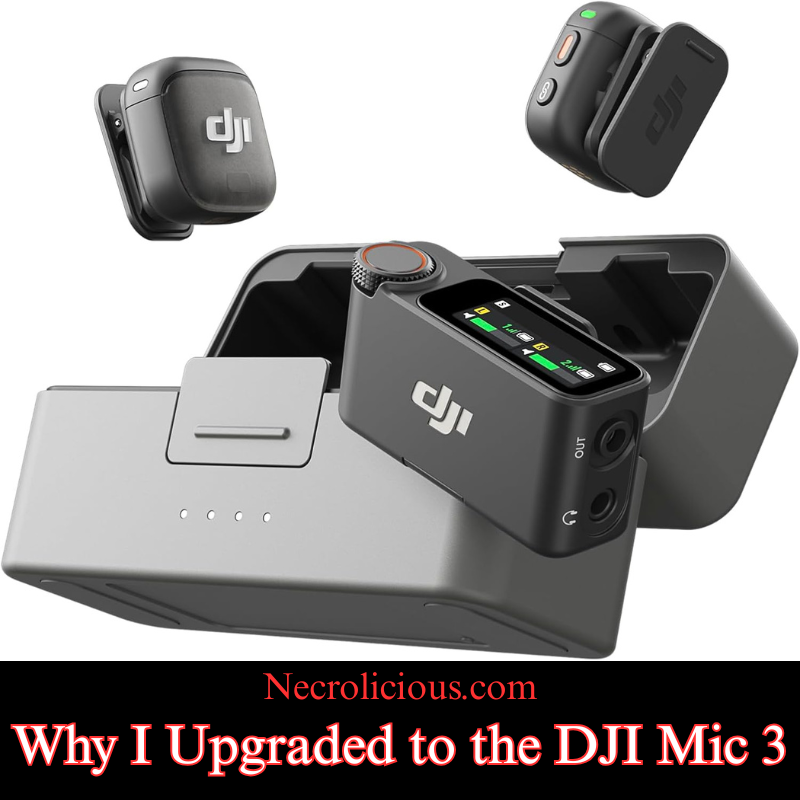
Speaking of memory the onboard recording on the Mic 3 is four times that of the Mic 2. The Mic 2 only had 8 gigabytes of internal memory whereas the Mic 3 has 32 gigabytes. Plus it allows you to dual record tracks of both the native audio input & the AI-enhanced audio adjusted input. Beyond storage, the Mic 3’s dual-band wireless technology ensures more stable connections in crowded environments & its voice tone presets let you tailor audio output on the fly—options like “natural” for interviews or “bright” for energetic content. Compatibility is broad including seamless integration with DJI cameras smartphones & laptops via adapters, though I recommend testing with your specific setup.
Concert Recording?
On the subject of adjustments, this should ostensibly allow better recording of live concerts, something that the Mic 2 was notoriously bad at. Try as I may, no Mic 2 settings configuration stopped the audio from being so unusably bad that I gave up & went on to recording a live concert using the Pocket 3’s onboard recorder (which sounds fine & non-distorted) instead of any external microphone whatsoever. The Mic 3’s enhancements could mitigate such distortion from high-decibel events by capturing a wider dynamic range. Though there were several articles on the topic of the Mic 2’s poor concert recording capabilities, I have not been able to source any content, positive or negative, in regards to concert use for the Mic 3, so I will personally conduct tests in the coming weeks using the various settings to see if I can get non-distorted audio in a live concert setting. If successful, it could make the Mic 3 a viable option for capturing live performances. If you do not intend to record concerts, at all this isn’t anything you need to worry about, no matter which generation of the Mic series you possess. The Mic 2 has always performed exceptionally well when simply speaking into it, as most creators do–but it is something to keep in mind if you actually intend to record concerts, whether you are a musician or a spectator.
Enhanced Communication via Numerology
Lastly, this is a little bit more on a personal note that many people may not take into account or take seriously at all, but in numerology the number 3 is the number of communication. Therefore, I think that having a device branded with the number 3 will metaphysically enhance my communication skills & help me convey what I wish to to my viewing audience. Like astrology, etc. I think it’s good fun & I enjoy things such as this, but no need to take it into account if you are not spiritual or superstitious.
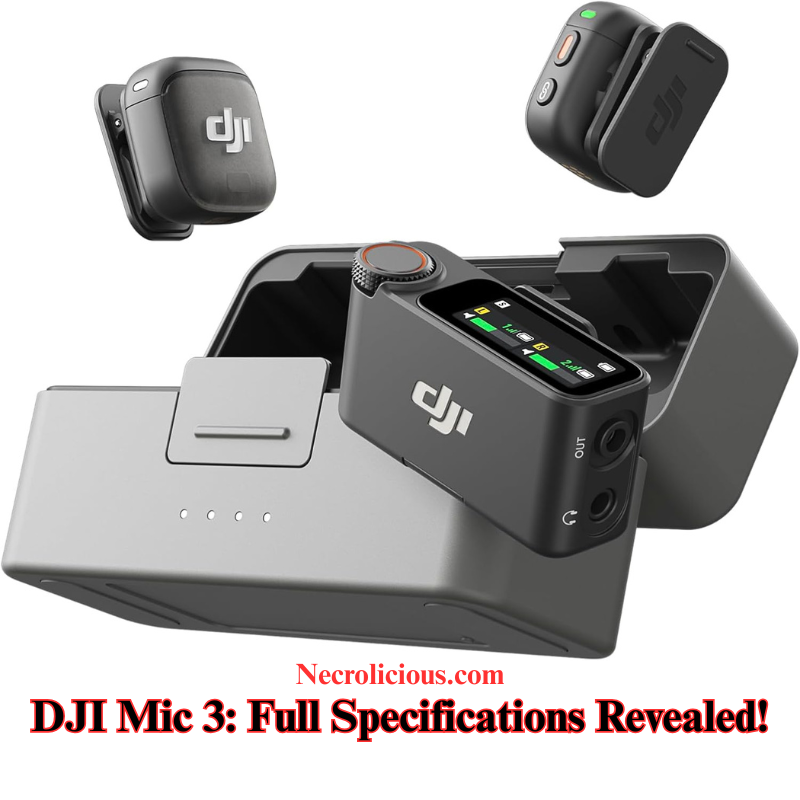
To help illustrate the key differences at a glance here is a detailed comparison of specifications between the DJI Mic 2 & Mic 3 based on official details & hands-on reviews:
| Feature | DJI Mic 2 | DJI Mic 3 |
|---|---|---|
| Internal Storage (per Transmitter) | 8 GB (approx. 14 hours of 48kHz/24-bit audio) | 32 GB (approx. 56 hours of 48kHz/24-bit audio) |
| Battery Life (Total with Charging Case) | Up to 18 hours | Up to 28 hours |
| Transmitter Dimensions | 46.06 × 30.96 × 21.83 mm | 28.77 × 28.34 × 16.35 mm (with magnetic clip) |
| Transmitter Weight | 28 g | 16 g (with magnetic clip); approx. 10 g without |
| Wireless Range (Line of Sight) | Up to 250 m (FCC); 160 m (CE) | Up to 400 m (FCC); 250 m (CE) with dual-band (2.4/5 GHz) support |
| Audio Recording Format | 24-bit/48kHz; 32-bit float option | 24-bit/48kHz; enhanced 32-bit float with dual-file (processed & unprocessed) & lossless recording |
| Noise Reduction Levels | Single setting | Two levels (standard & strong) with AI enhancements |
| Additional Features | 3.5mm jack for external mics; basic noise cancelling | Timecode syncing for multi-camera shoots; voice tone presets (e.g. natural, warm, bright); supports up to 4 transmitters; AMOLED touchscreen with rotary knob on receiver; no 3.5mm jack |
| Wireless Technology | 2.4 GHz | Dual-band 2.4/5.8 GHz with automatic frequency hopping & Bluetooth integration |
This table highlights tangible upgrades in portability battery life & audio flexibility which influenced my decision but also underscores trade-offs like the lack of a 3.5mm jack.
Pros & Cons of Upgrading to the DJI Mic 3
While the Mic 2 remains a solid choice for most users the Mic 3 introduces refinements that could justify an upgrade depending on your needs. Here is a balanced overview tied to common scenarios:
Pros:
- Enhanced Portability for On-the-Go Creators: The transmitters are significantly smaller & lighter making them ideal for vloggers or mobile journalists who prioritise discretion & comfort during long shoots. For instance if you are filming travel content or interviews the reduced bulk (from 28g to 16g) means less fatigue without sacrificing audio quality.
- Superior Battery Life & Range for Extended Use: With up to 28 hours total battery (versus 18 hours) & a 400m range this suits event videographers or drone operators needing reliable wireless performance in larger venues or outdoors. It reduces the need for mid-shoot recharges & minimises dropouts.
- Advanced Audio Features for Professionals: Dual-file recording (native & AI-processed) voice tone presets & two-level noise cancellation allow for better post-production flexibility. This is a boon for podcasters or filmmakers dealing with noisy environments or requiring customised sound profiles like a “warm” tone for voiceovers.
- Timecode Syncing for Multi-Device Workflows: If you work with multiple cameras (e.g. DJI Osmo Pocket or cinema rigs) the built-in timecode ensures seamless audio-video alignment saving hours in editing. This is particularly valuable for professional video production teams.
Cons:
- Loss of 3.5mm Jack for External Mics: As mentioned this limits compatibility with lavalier or shotgun mics which could be a dealbreaker for users relying on specialised audio inputs. Stick with the Mic 2 if you need this versatility.
- Potential Overkill for Beginners: Features like timecode & dual-band may go unused by hobbyists or solo creators leading to unnecessary complexity. If your setup is simple (e.g. smartphone vlogging) the Mic 2 offers better value.
Ultimately weigh these against your workflow—for vloggers the pros in portability shine while professionals may appreciate the advanced tools but casual users might skip the upgrade.
The prior generations still work great & I would definitely recommend them for content creators that either do not have the funds or general interest in the Mic 3. For many use cases there is simply no need to upgrade to it &, for others, there are actual reasons why you would not want to upgrade such as the DJI Mic 3 not having a 3.5mm audio jack to which you can connect a lavalier mic or shotgun mic to, but in the entirety of the time that I have owned the Mic 2 which is just shy of two years now I have never once needed that audio jack except to plug in the windscreen.

Unless otherwise noted, image assets above are NOT original content & are shared under fair use doctrine with NO claims to authorship or ownership.
Contact necrolicious@necrolicious.com for credit or removal.
This post was sponsored by…ME! If you’d like to support, please buy my original meme merchandise or check out my affiliate links to get yourself some other cool things. Additional affiliate links may be contained in the above article. If you click on an affiliate link & sign up/make a purchase, I may earn a commission. This does not increase the price you pay for the product or service, so it helps support this website at no cost to you.