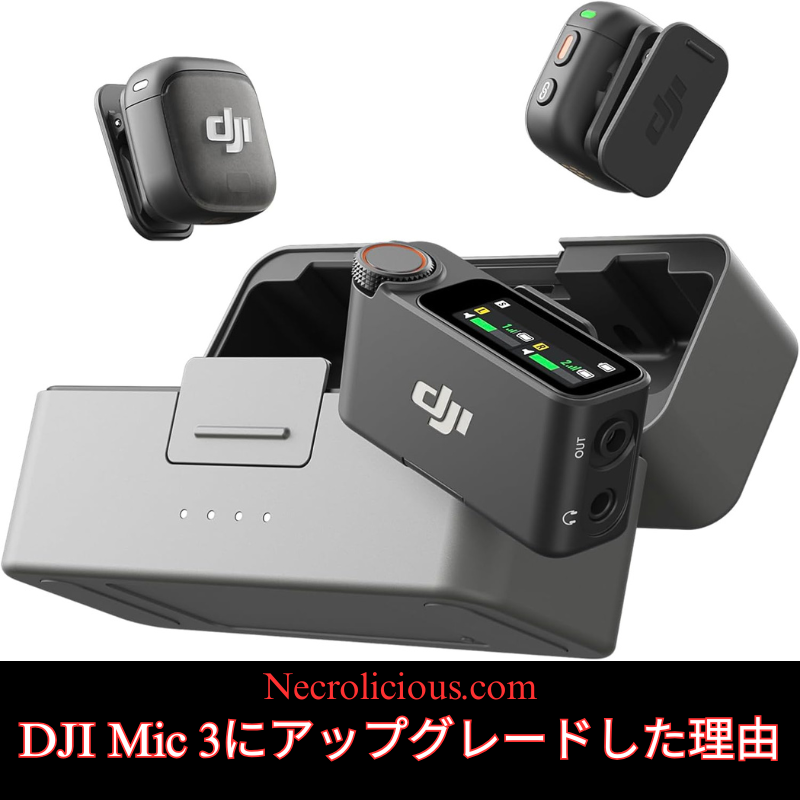
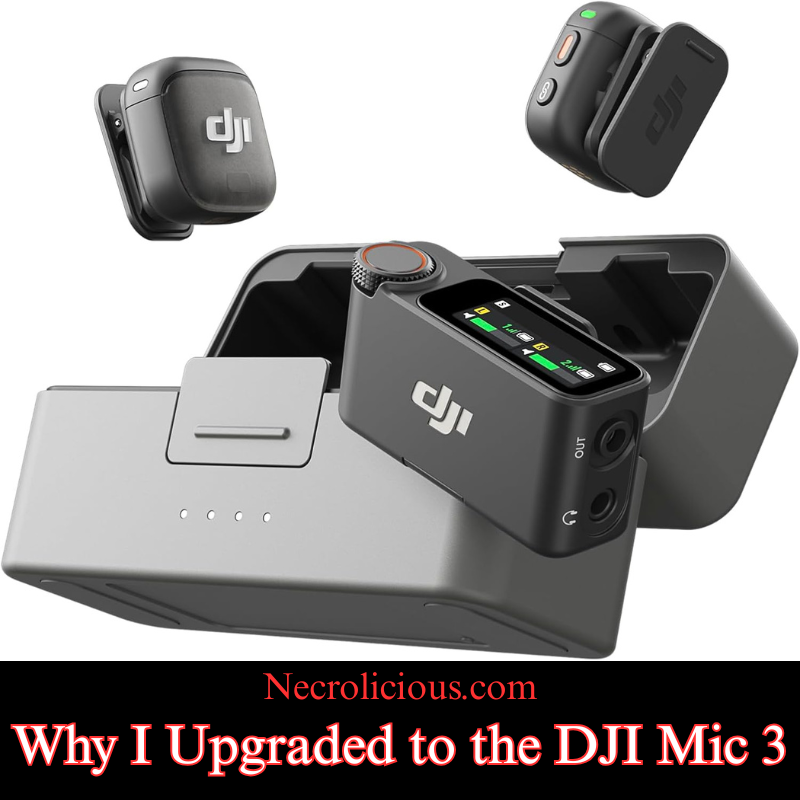
I was always very satisfied with my DJI Mic 2 & probably would not have upgraded to the Mic 3, were it not for the current 14% off sale which continues until February 10th (2026). Since the Mic 3 became 14% off & I got an additional 2,828 Rakuten points for the purchase, it just made sense to sell off my Mic 2 & buy to the Mic 3 — the sale basically made it free for me to upgrade! But that’s not the only reason I upgraded from the DJI Mic 2 to the DJI Mic 3. There are several other reasons, which I will delve into in this article, so you can be better informed about your own decision as to whether or not to upgrade from a prior-generation DJI Microphone. Without further ado, here are my reasons:
There is also the matter of the memory supply crunch which will be affecting technology for at least the next couple of years. I have written my own reports on this topic, but I am not the only one ringing the alarm bell to get what devices you can before major repricing; other well-respected technological news outlets are now reporting similar cautions, urging people to buy a Nintendo Switch 2 now before a global repricing occurs. I don’t think this will remain specific to the Nintendo Switch 2 alone, but rather ANY device which has memory components, such as the Mic 3. This crunch stems from ongoing global supply chain issues & increased demand for AI-driven devices which could drive up prices for memory-intensive products like the Mic 3’s expanded 32GB storage. If you are eyeing an upgrade, acting soon might avoid future cost hikes similar to those anticipated for gaming consoles & smartphones.
Enhanced On-Board Memory & Related Features
Speaking of memory the onboard recording on the Mic 3 is four times that of the Mic 2. The Mic 2 only had 8 gigabytes of internal memory whereas the Mic 3 has 32 gigabytes. Plus it allows you to dual record tracks of both the native audio input & the AI-enhanced audio adjusted input. Beyond storage, the Mic 3’s dual-band wireless technology ensures more stable connections in crowded environments & its voice tone presets let you tailor audio output on the fly—options like “natural” for interviews or “bright” for energetic content. Compatibility is broad including seamless integration with DJI cameras smartphones & laptops via adapters, though I recommend testing with your specific setup.
Concert Recording?
On the subject of adjustments, this should ostensibly allow better recording of live concerts, something that the Mic 2 was notoriously bad at. Try as I may, no Mic 2 settings configuration stopped the audio from being so unusably bad that I gave up & went on to recording a live concert using the Pocket 3’s onboard recorder (which sounds fine & non-distorted) instead of any external microphone whatsoever. The Mic 3’s enhancements could mitigate such distortion from high-decibel events by capturing a wider dynamic range. Though there were several articles on the topic of the Mic 2’s poor concert recording capabilities, I have not been able to source any content, positive or negative, in regards to concert use for the Mic 3, so I will personally conduct tests in the coming weeks using the various settings to see if I can get non-distorted audio in a live concert setting. If successful, it could make the Mic 3 a viable option for capturing live performances. If you do not intend to record concerts, at all this isn’t anything you need to worry about, no matter which generation of the Mic series you possess. The Mic 2 has always performed exceptionally well when simply speaking into it, as most creators do–but it is something to keep in mind if you actually intend to record concerts, whether you are a musician or a spectator.
Enhanced Communication via Numerology
Lastly, this is a little bit more on a personal note that many people may not take into account or take seriously at all, but in numerology the number 3 is the number of communication. Therefore, I think that having a device branded with the number 3 will metaphysically enhance my communication skills & help me convey what I wish to to my viewing audience. Like astrology, etc. I think it’s good fun & I enjoy things such as this, but no need to take it into account if you are not spiritual or superstitious.
To help illustrate the key differences at a glance here is a detailed comparison of specifications between the DJI Mic 2 & Mic 3 based on official details & hands-on reviews:
Feature
DJI Mic 2
DJI Mic 3
Internal Storage (per Transmitter)
8 GB (approx. 14 hours of 48kHz/24-bit audio)
32 GB (approx. 56 hours of 48kHz/24-bit audio)
Battery Life (Total with Charging Case)
Up to 18 hours
Up to 28 hours
Transmitter Dimensions
46.06 × 30.96 × 21.83 mm
28.77 × 28.34 × 16.35 mm (with magnetic clip)
Transmitter Weight
28 g
16 g (with magnetic clip); approx. 10 g without
Wireless Range (Line of Sight)
Up to 250 m (FCC); 160 m (CE)
Up to 400 m (FCC); 250 m (CE) with dual-band (2.4/5 GHz) support
Two levels (standard & strong) with AI enhancements
Additional Features
3.5mm jack for external mics; basic noise cancelling
Timecode syncing for multi-camera shoots; voice tone presets (e.g. natural, warm, bright); supports up to 4 transmitters; AMOLED touchscreen with rotary knob on receiver; no 3.5mm jack
Wireless Technology
2.4 GHz
Dual-band 2.4/5.8 GHz with automatic frequency hopping & Bluetooth integration
This table highlights tangible upgrades in portability battery life & audio flexibility which influenced my decision but also underscores trade-offs like the lack of a 3.5mm jack.
Pros & Cons of Upgrading to the DJI Mic 3
While the Mic 2 remains a solid choice for most users the Mic 3 introduces refinements that could justify an upgrade depending on your needs. Here is a balanced overview tied to common scenarios:
Pros:
Enhanced Portability for On-the-Go Creators: The transmitters are significantly smaller & lighter making them ideal for vloggers or mobile journalists who prioritise discretion & comfort during long shoots. For instance if you are filming travel content or interviews the reduced bulk (from 28g to 16g) means less fatigue without sacrificing audio quality.
Superior Battery Life & Range for Extended Use: With up to 28 hours total battery (versus 18 hours) & a 400m range this suits event videographers or drone operators needing reliable wireless performance in larger venues or outdoors. It reduces the need for mid-shoot recharges & minimises dropouts.
Advanced Audio Features for Professionals: Dual-file recording (native & AI-processed) voice tone presets & two-level noise cancellation allow for better post-production flexibility. This is a boon for podcasters or filmmakers dealing with noisy environments or requiring customised sound profiles like a “warm” tone for voiceovers.
Timecode Syncing for Multi-Device Workflows: If you work with multiple cameras (e.g. DJI Osmo Pocket or cinema rigs) the built-in timecode ensures seamless audio-video alignment saving hours in editing. This is particularly valuable for professional video production teams.
Cons:
Loss of 3.5mm Jack for External Mics: As mentioned this limits compatibility with lavalier or shotgun mics which could be a dealbreaker for users relying on specialised audio inputs. Stick with the Mic 2 if you need this versatility.
Potential Overkill for Beginners: Features like timecode & dual-band may go unused by hobbyists or solo creators leading to unnecessary complexity. If your setup is simple (e.g. smartphone vlogging) the Mic 2 offers better value.
Ultimately weigh these against your workflow—for vloggers the pros in portability shine while professionals may appreciate the advanced tools but casual users might skip the upgrade.
The prior generations still work great & I would definitely recommend them for content creators that either do not have the funds or general interest in the Mic 3. For many use cases there is simply no need to upgrade to it &, for others, there are actual reasons why you would not want to upgrade such as the DJI Mic 3 not having a 3.5mm audio jack to which you can connect a lavalier mic or shotgun mic to, but in the entirety of the time that I have owned the Mic 2 which is just shy of two years now I have never once needed that audio jack except to plug in the windscreen.
Unless otherwise noted, image assets above are NOT original content & are shared under fair use doctrine with NO claims to authorship or ownership. Contact necrolicious@necrolicious.com for credit or removal.
This post was sponsored by…ME! If you’d like to support, please buy my original meme merchandise or check out my affiliate links to get yourself some other cool things. Additional affiliate links may be contained in the above article. If you click on an affiliate link & sign up/make a purchase, I may earn a commission. This does not increase the price you pay for the product or service, so it helps support this website at no cost to you.
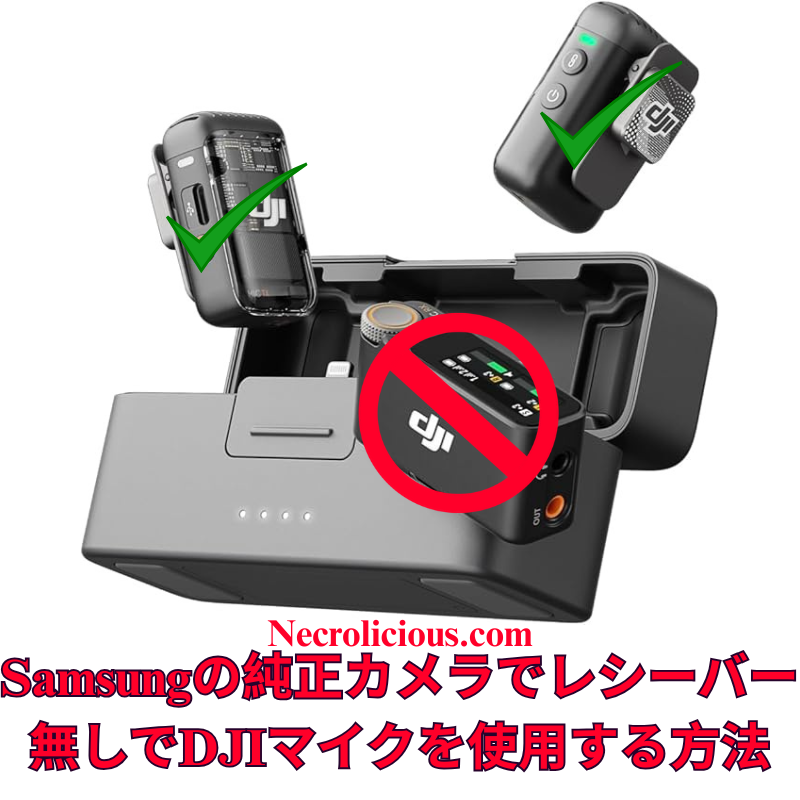
広範なオンライン調査とテストを経て、DJI Mic 2をSamsung Galaxyデバイスのネイティブカメラアプリケーションにワイヤレスで接続することが、他のプラットフォームに比べて格段に簡単であることを確認しました。iOSではカメラアプリでのBluetoothオーディオ入力が制限されていますが、SamsungのOne UIでは、標準のカメラアプリのプロビデオモード内で外部Bluetoothマイクを直接選択できます。これにより、サードパーティ製アプリや追加のアダプターが不要となり、高品質なオーディオを求めるクリエイターにとって、余分な機器なしでシームレスなソリューションを提供します。この方法は、Samsung Galaxyの最新モデル(S23およびS24シリーズ)でDJI Mic 2のトランスミッターを直接使用してテストおよび検証済みです。この方法は他のブランドのBluetoothマイクでも機能する可能性がありますが、DJI Mic MiniやMic 3などの代替品についてはテストしていません。他のBluetoothマイクで試した場合は、コメント欄で結果を共有してください。
この方法の価値
DJI Mic 2は、32ビットフロート内部録音やインテリジェントノイズキャンセリングなどの優れたオーディオ品質を提供します。しかし、レシーバーはモバイルビデオ制作において不要なコストと複雑さを追加します。SamsungのプロビデオモードでのBluetoothマイクのネイティブサポートは、コスト効果が高く、持ち運びが簡単で、プロフェッショナルなオーディオ基準を維持するソリューションを提供し、クリエイターの録音プロセスを簡素化します。
DJI Mic 2をレシーバーなしでビデオ録画するためのステップごとのガイド
DJI Mic 2をBluetoothで接続する: DJI Mic 2トランスミッターの電源を入れます。録音ボタン(リンクボタン)を3秒間長押しし、ステータスインジケーターが青く点滅してBluetoothペアリングモードに入るのを確認します。Samsung Galaxyデバイスで、設定 > 接続 > Bluetoothに移動し、Bluetoothが有効になっていることを確認し、利用可能なデバイスリストから「DJI Mic 2」(ヘッドセットまたはマイクとして表示される場合があります)を選択します。ペアリングのプロンプトを承認します。接続が完了すると、インジケーターが青く点灯します。
DJI Mic 2をオーディオ入力として選択する: プロビデオモードで、画面右側の録画ボタンの上または近くにあるオーディオ設定アイコン(通常はマイクのシンボル)を探します。それをタップしてオーディオソースメニューにアクセスします。「Bluetooth」または「外部マイク」を選択(DJI Mic 2が直接表示される場合があります)。必要に応じて内部マイクを無効にしてください。アプリはこれでDJI Mic 2からのオーディオを使用します。
ビデオを録画する: 解像度、フレームレート、露出などのビデオパラメータを必要に応じて調整します。録画ボタンを押してビデオ撮影を開始します。DJI Mic 2はワイヤレスで高品質なオーディオを映像と同期して録音します。オーディオレベルと明瞭さを確認するために、短いテストクリップを録画することをお勧めします。
仕組み
SamsungのOne UIは、AndroidのBluetoothオーディオフレームワークを基盤としており、プロビデオモードでiOSに見られる制限なしに外部マイク入力をサポートします。ペアリングが完了すると、DJI Mic 2は標準のBluetoothオーディオデバイスとして機能し、プロビデオモードでは入力ソースを明示的に選択できます。これにより、追加のソフトウェアやハードウェアを必要とせずに、ネイティブアプリ内でリアルタイムのワイヤレスオーディオキャプチャが実現します。
追加のガイダンス
ゲイン調整: 録画前にDJI Mic 2のタッチスクリーンまたはDJI Mimoアプリ(インストールされている場合)を使用してゲイン設定を調整します。さまざまな環境で最適なオーディオレベルを確認するためにテストクリップを録画することをお勧めします。
ファームウェアおよびソフトウェアのアップデート: DJI Mimoアプリを通じてDJI Mic 2のファームウェアを最新に保ち、Samsung Galaxyデバイスが最新のAndroid/One UIバージョンを実行していることを確認して、接続の問題を防ぎます。
この方法により、クリエイターはSamsungのネイティブカメラアプリを使用して、DJI Mic 2でプロフェッショナルグレードのビデオとオーディオをレシーバーなしでキャプチャできます。あなたのGalaxyデバイスでこの方法を試しましたか?または別のソリューションを発見しましたか?コメントでフィードバックを共有し、志望するビデオグラファーを支援するためにこのガイドを広めてください。
完全なセットアップを希望する場合は、レシーバーを含むフルDJI Mic 2キットがより幅広い互換性を確保します。最近のMic 3のリリースに伴い、Mic 2の価格は過去最低レベルに達しており、購入を検討する絶好の機会です。
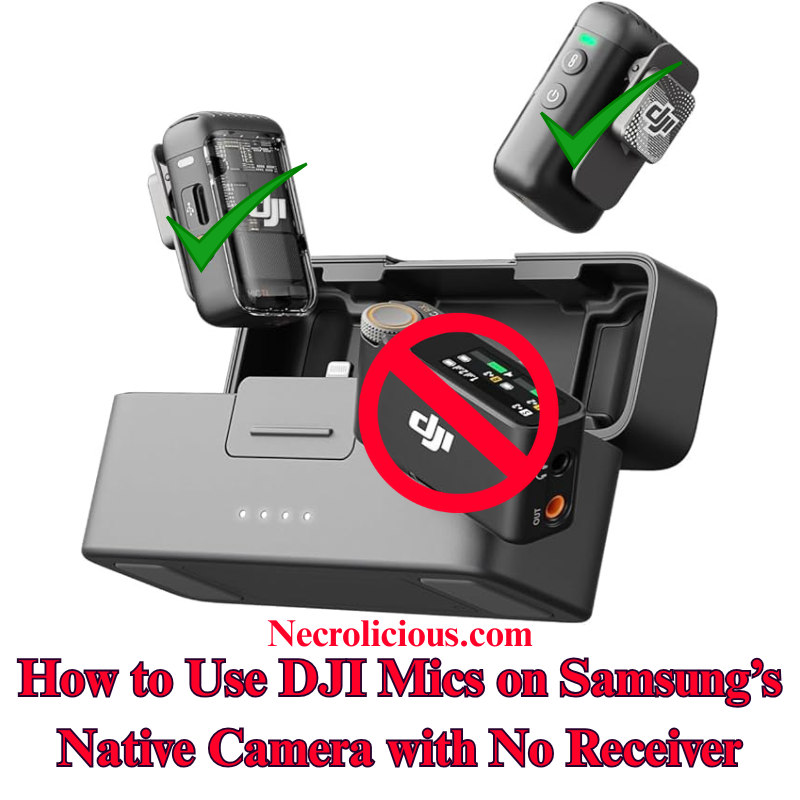
Following extensive online research and testing, I have confirmed that connecting the DJI Mic 2 wirelessly to a Samsung Galaxy device’s native Camera application is significantly more straightforward than on other platforms. Unlike iOS, which restricts Bluetooth audio input in its Camera application, Samsung’s One UI enables direct selection of external Bluetooth microphones within the Pro Video mode of the stock Camera application. This eliminates the need for third-party applications or additional adapters, offering a seamless solution for creators seeking high-quality audio without extra equipment. I have tested & verified this method on recent Samsung Galaxy models, including the S23 & S24 series, using the DJI Mic 2 transmitter directly. This approach is likely to function with other Bluetooth microphones from various brands, though I have not tested alternatives such as the DJI Mic Mini or Mic 3. If you experiment with a different Bluetooth microphone, please share your results in the comments below.
Why This Method is Valuable
The DJI Mic 2 delivers exceptional audio quality, with features such as 32-bit float internal recording and intelligent noise cancellation. However, the receiver adds unnecessary cost & complexity for mobile video production. Samsung’s native support for Bluetooth microphones in Pro Video mode provides a cost-effective, portable solution that maintains professional audio standards, simplifying the recording process for creators.
Step-by-Step Guide to Recording Video with DJI Mic 2, No Receiver
Connect DJI Mic 2 via Bluetooth: Power on the DJI Mic 2 transmitter. Press and hold the record button (link button) for three seconds until the status indicator flashes blue, entering Bluetooth pairing mode. On your Samsung Galaxy device, navigate to Settings > Connections > Bluetooth, ensure Bluetooth is enabled & select “DJI Mic 2” from the list of available devices (it may appear as a headset or microphone). Confirm any pairing prompts. The indicator will turn solid blue once connected.
Launch the Native Camera Application in Pro Video Mode: Open the stock Camera application on your Samsung Galaxy device. Swipe left or tap “MORE” at the bottom, then select “PRO VIDEO”. This mode provides advanced controls, including the ability to select external audio inputs.
Select the DJI Mic 2 as Audio Input: In Pro Video mode, locate the audio settings icon (typically a microphone symbol) above or near the record button on the right side of the screen. Tap it to access the audio source menu. Choose “Bluetooth” or “External Mic” (it may list the DJI Mic 2 directly). Ensure the internal microphone is disabled if prompted. The application will now utilise audio from the DJI Mic 2.
Record Your Video: Adjust video parameters such as resolution, frame rate, or exposure as required. Press the record button to begin capturing video. The DJI Mic 2 will wirelessly record high-quality audio synchronised with your footage. Record a short test clip to verify audio levels and clarity.
How It Works
Samsung’s One UI, built on Android’s Bluetooth audio framework, supports external microphone input in Pro Video mode without the restrictions found in iOS. Once paired, the DJI Mic 2 functions as a standard Bluetooth audio device & Pro Video mode allows explicit selection of the input source. This ensures real-time wireless audio capture directly within the native application, eliminating the need for additional software or hardware.
Additional Guidance
Gain Adjustment: Adjust the DJI Mic 2’s gain settings via its built-in touchscreen or the DJI Mimo application (if installed) before recording. Test clips are recommended to ensure optimal audio levels in varied environments.
Firmware & Software Updates: Keep the DJI Mic 2 firmware updated via the DJI Mimo application, and ensure your Samsung Galaxy device runs the latest Android/One UI version to prevent connectivity issues.
Limitations for Live Streaming: This Bluetooth method may introduce slight latency, making it less suitable for live streaming. For such applications, consider using the wired receiver connected via a USB-C adapter.
Alternative Applications: If Pro Video mode is unavailable or you encounter issues, applications such as Open Camera or Blackmagic Camera support Bluetooth microphones and can serve as alternatives. However, for seamless integration, the stock Camera application is recommended. Note that older Samsung models with Exynos processors (e.g., pre-S21 European variants) may have compatibility limitations; Snapdragon-based devices, such as the S23 or S24 series, perform optimally.
Stereo Recording: For dual transmitters, pair both via Bluetooth, but verify stereo support in Pro Video settings, as mono is the default. Full stereo recording may require the receiver.
This method enables creators to capture professional-grade video & audio using the DJI Mic 2 with Samsung’s native Camera application, without requiring a receiver. Have you tested this approach on your Galaxy device, or discovered alternative solutions? Please share your feedback in the comments & distribute this guide to assist fellow aspiring videographers.
For those preferring a complete setup, the full DJI Mic 2 kit, including the receiver, ensures broader compatibility. With the recent release of the Mic 3, prices for the Mic 2 have reached their lowest levels, making it an excellent time to consider purchasing.
Unless otherwise noted, image assets above are NOT original content & are shared under fair use doctrine with NO claims to authorship or ownership. Contact necrolicious@necrolicious.com for credit or removal.
This post was sponsored by…ME! If you’d like to support, please buy my original meme merchandise or check out my affiliate links to get yourself some other cool things. Additional affiliate links may be contained in the above article. If you click on an affiliate link & sign up/make a purchase, I may earn a commission. This does not increase the price you pay for the product or service, so it helps support this website at no cost to you.
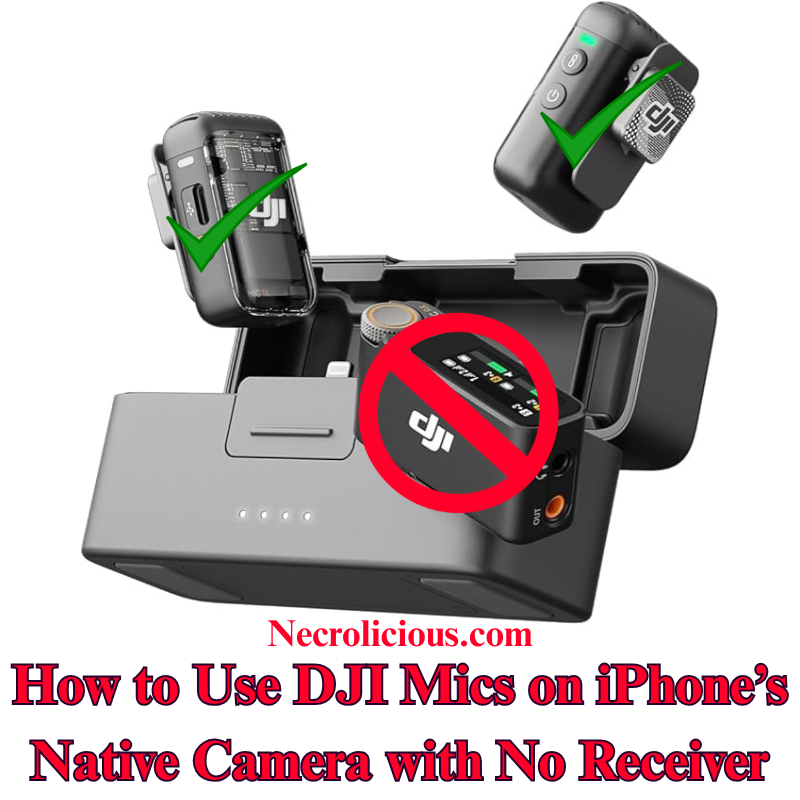
広範なオンライン調査を行いましたが、DJI Mic 2をiPhoneのネイティブカメラアプリでワイヤレスに使用するための明確な手順は見つかりませんでした。Grokに相談し、Bluetoothを活用した簡単な方法を開発しました。このガイドを共有し、クリエイターが高品質なオーディオをDJI Mic 2とiPhoneの標準カメラアプリで実現し、追加の機器コストを回避できるよう支援します。この方法はDJI Mic 2でテスト済みであり、動作が確認されています。他のブランドのBluetoothマイクでも動作する可能性が高いと考えられますが、DJI Mic MiniやDJI Mic 3、他のブランドのマイクはテストしていません。他のBluetoothマイクをお持ちの方は、ぜひ試してみて、以下にコメントで結果を共有してください。
この方法の価値
DJI Mic 2は優れた音質を提供しますが、iPhoneのカメラアプリはBluetooth機能をネイティブにサポートしていません。レシーバーの購入は費用とセットアップの複雑さを増加させます。この無料のソリューションは、RØDE Reporterアプリを活用し、ポータブルでワイヤレスな録音体験を保証します。
ネイティブカメラアプリを開く:RØDE Reporterをバックグラウンドで実行したまま、iPhoneのカメラアプリを起動し、ビデオモードを選択。DJI Mic 2がワイヤレスで音声をキャプチャします。
ビデオを録画:録画を開始し、短いテストクリップを作成して音質とレベルを確認してください。 注:Bluetooth接続により音声出力がDJI Mic 2にルーティングされる場合がありますが、スピーカーはありません。録画後にiPhoneのスピーカーで再生するには、Bluetoothを無効にするか、Mic 2の電源を切ってください。
After extensive online research, I found no clear instructions for using the DJI Mic 2 wirelessly with the iPhone’s native Camera app for video recording. Consulting Grok, I developed a straightforward method using Bluetooth, eliminating the need for a receiver. I’m sharing this guide to help creators achieve high-quality audio with their DJI Mic 2 on the iPhone’s default Camera app, avoiding additional equipment costs. Note that I have tested & confirmed that this method works with the DJI mic 2. I highly suspect that it may also work with other Bluetooth microphones, including those by other brands, but I do not have the DJI Mic Mini or the DJI Mic 3, nor do I have other brands to test with. If you have another brand of Bluetooth microphone, please give it a try & comment below if it works.
Why This Method is Valuable
The DJI Mic 2 offers exceptional audio quality, but its Bluetooth functionality isn’t natively supported by the iPhone’s Camera app for video. Purchasing the receiver increases expense & setup complexity. This cost-free solution, utilising the RØDE Reporter app, ensures a portable, wireless recording experience.
Step-by-Step Guide to Recording Video with DJI Mic 2 with no Receiver
Install RØDE Reporter: Search for “RØDE Reporter” in the App Store, download it, & grant microphone permissions when prompted.
Connect DJI Mic 2 via Bluetooth: Press & hold the pairing button on the DJI Mic 2 transmitter until the indicator flashes, entering pairing mode. On your iPhone, navigate to Settings > Bluetooth & select the DJI Mic 2 (it may appear as “headphones”).
Confirm Connection in RØDE Reporter: Launch the app & verify it displays “External Microphone” rather than “Internal Microphone,” indicating the DJI Mic 2 is connected.
Open the Native Camera App: Keep RØDE Reporter running in the background. Launch the iPhone’s Camera app, select Video mode, & the DJI Mic 2 will capture audio wirelessly.
Record Your Video: Begin recording. Create a short test clip to ensure audio quality & levels are satisfactory.
NOTE: The Bluetooth connection may route audio output to the DJI Mic 2, which lacks speakers. Disable Bluetooth or power off the Mic 2 to hear playback through your iPhone speakers after recording.
How It Works
iOS restricts Bluetooth microphones in the native Camera app. By activating the Bluetooth audio session in RØDE Reporter, the connection persists when switching to the Camera app, enabling wireless audio capture.
Additional Tips
Record a test clip to adjust the mic’s gain via its settings.
Ensure the DJI Mic 2 firmware & iOS are updated to prevent connectivity issues.
For live streaming, this method is unreliable; use the wired receiver instead.
Another option for using the DJI Mic 2 & other Bluetooth microphones is to download the Blackmagic Camera app & record using it instead of the native iPhone camera, but some users have reported issues with file management using this app, so this article’s method is best for those who prefer to use the native iPhone camera rather than 3rd party camera apps.
This method enables creators to record professional-grade video audio with the DJI Mic 2 on the iPhone’s native Camera app, without a receiver. Have you tested this approach or discovered other solutions? Share your feedback below & distribute this guide to assist fellow creators.
Of course, if you want to avoid the added hassle of such workarounds, you can buy the real thing, transmitter included. Prices on the Mic 2 recently dropped to record lows with the release of the Mic 3, so there has never been a better time to buy!
Unless otherwise noted, image assets above are NOT original content & are shared under fair use doctrine with NO claims to authorship or ownership. Contact necrolicious@necrolicious.com for credit or removal.
This post was sponsored by…ME! If you’d like to support, please buy my original meme merchandise or check out my affiliate links to get yourself some other cool things. Additional affiliate links may be contained in the above article. If you click on an affiliate link & sign up/make a purchase, I may earn a commission. This does not increase the price you pay for the product or service, so it helps support this website at no cost to you.
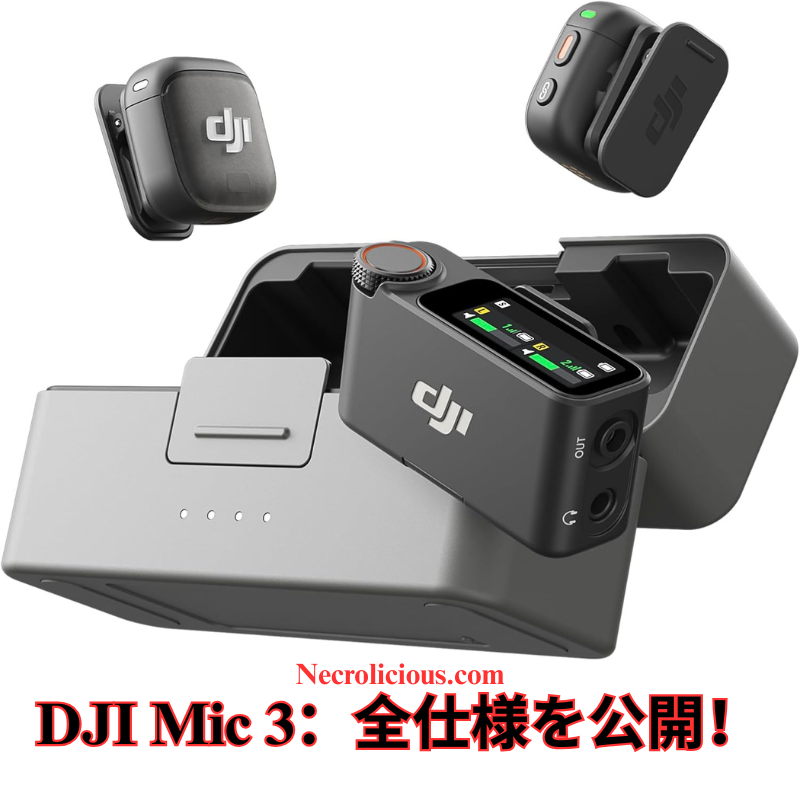
コンテンツクリエイター、映画製作者、またはポッドキャスターの皆様、音声の途切れ、チャンネル制限、かさばる機器に悩まされていませんか?2025年8月28日に発売されたDJI Mic 3は、DJIが提供するワイヤレスマイク技術の最新進化形です。このコンパクトでパワフルなデバイスは、DJI Mic 2の成功を基盤とし、4TX + 8RX機能、統合されたタイムコード、ダブルバンドアンチインターフェア技術を搭載し、あらゆる環境で完璧なオーディオを実現します。本記事では、DJI Mic 3の新機能を詳しく解説し、DJI Mic 2との比較を行い、2025年のプロフェッショナルオーディオ録音に必須のアップグレード理由を説明します。「DJI Mic 3 仕様」、「DJI Mic 3 vs Mic 2」、または「ビデオ用ベストワイヤレスマイク」をお探しの方に最適な情報をお届けします。
DJI Mic 3が現代のクリエイターに必須である理由
DJI Mic 3は単なる小改良ではなく、今日のマルチカメラ撮影、ライブストリーミング、モバイルコンテンツ制作のニーズに応える進化を遂げています。1つの送信機あたりわずか16g(マグネット付き)と驚異的に軽量で直感的であり、ワークフローに負担を加えることなくシームレスに統合されます。コンパクトな収納ケースは全てを整理整頓し、急速充電が長時間のセッションをサポートします。
これらの機能は、YouTuber、TikTokクリエイター、ウェディングビデオグラファー、その他プロフェッショナルグレードのオーディオを必要とするすべての人にとって理想的です。初期リークおよびハンズオンプレビューでは、全指向性パターン、126 dBの最大SPL、72 dBのSNRが優れた音質を保証していると評価されています。DJI Mic 2からのアップグレードを検討する方は、スケーラビリティと信頼性の即時的な向上が実感できるでしょう。
DJI Mic 3 vs DJI Mic 2:仕様比較
DJI Mic 3がアップグレードに値するかを判断するため、公式データに基づく詳細な仕様比較表を以下に示します。
この表は、DJI Mic 3がマルチデバイス対応、範囲、バッテリー寿命、オーディオ処理において優れていることを示し、プロフェッショナルレベルのツールでありながらコンパクトさを保っています。
DJI Mic 3へのアップグレードを検討すべきか?
現在DJI Mic 2を使用中の場合、Mic 3はより長い範囲、優れたノイズ処理、編集時間を短縮するタイムコードにより、アップグレードに十分な理由を提供します。ただし、ニーズが基本的なもの(例:ソロブログ)であれば、Mic 2は引き続き手頃で信頼できる選択肢です。キット価格はリークに基づき約$309と、優れたコストパフォーマンスを提供します。初期ユーザーからは、重要な撮影時の安心感をもたらすデュアルファイル録音が称賛されています。
Rode Wireless GO IIやSennheiser XSなどのワイヤレスマイクが市場に溢れる中、DJI Mic 3はDJIエコシステム(Osmo Pocketやドローンなど)との統合性や使いやすいアプリコントロールで際立っています。
最終感想:DJI Mic 3でオーディオを向上させよう
DJI Mic 3は革新的な機能でワイヤレスオーディオを再定義し、2025年のビデオ用ベストマイクの一つとして位置付けられます。ウェディング、ポッドキャスト、YouTubeコンテンツの撮影など、信頼性と使いやすさが制作を一変させます。アップグレードをご検討なら、公式DJIストアで今すぐチェックしてください。
DJI Mic 3についてどう思いますか?コメント欄でご意見をお寄せください。また、最新の技術レビュー&比較情報を受け取るために購読してください! #DJIMic3 #ワイヤレスマイク #コンテンツ制作